REMINDER: Install Latest Version of R and RStudio |
|
This guide was made in August 2018, so the instructions as to version numbers for R and RStudio are old. Please download the LATEST stable version of R and RStudio. As of Sun 28 July 2019, the latest stable versions are:
|
ADVICE FOR MAC USERS: Install XQuartz |
|
It is recommended that Mac Users install XQuartx. If you do not install it, you will not be able to use some packages (e.g., summarytools). Instructions:
|
1. Installing R – Windows Instructions |
Written instructions with screenshots
Step 1: Go to https://www.r-project.org/. You should see the screen below (Figure 1). Click on the “download R” hyperlink. 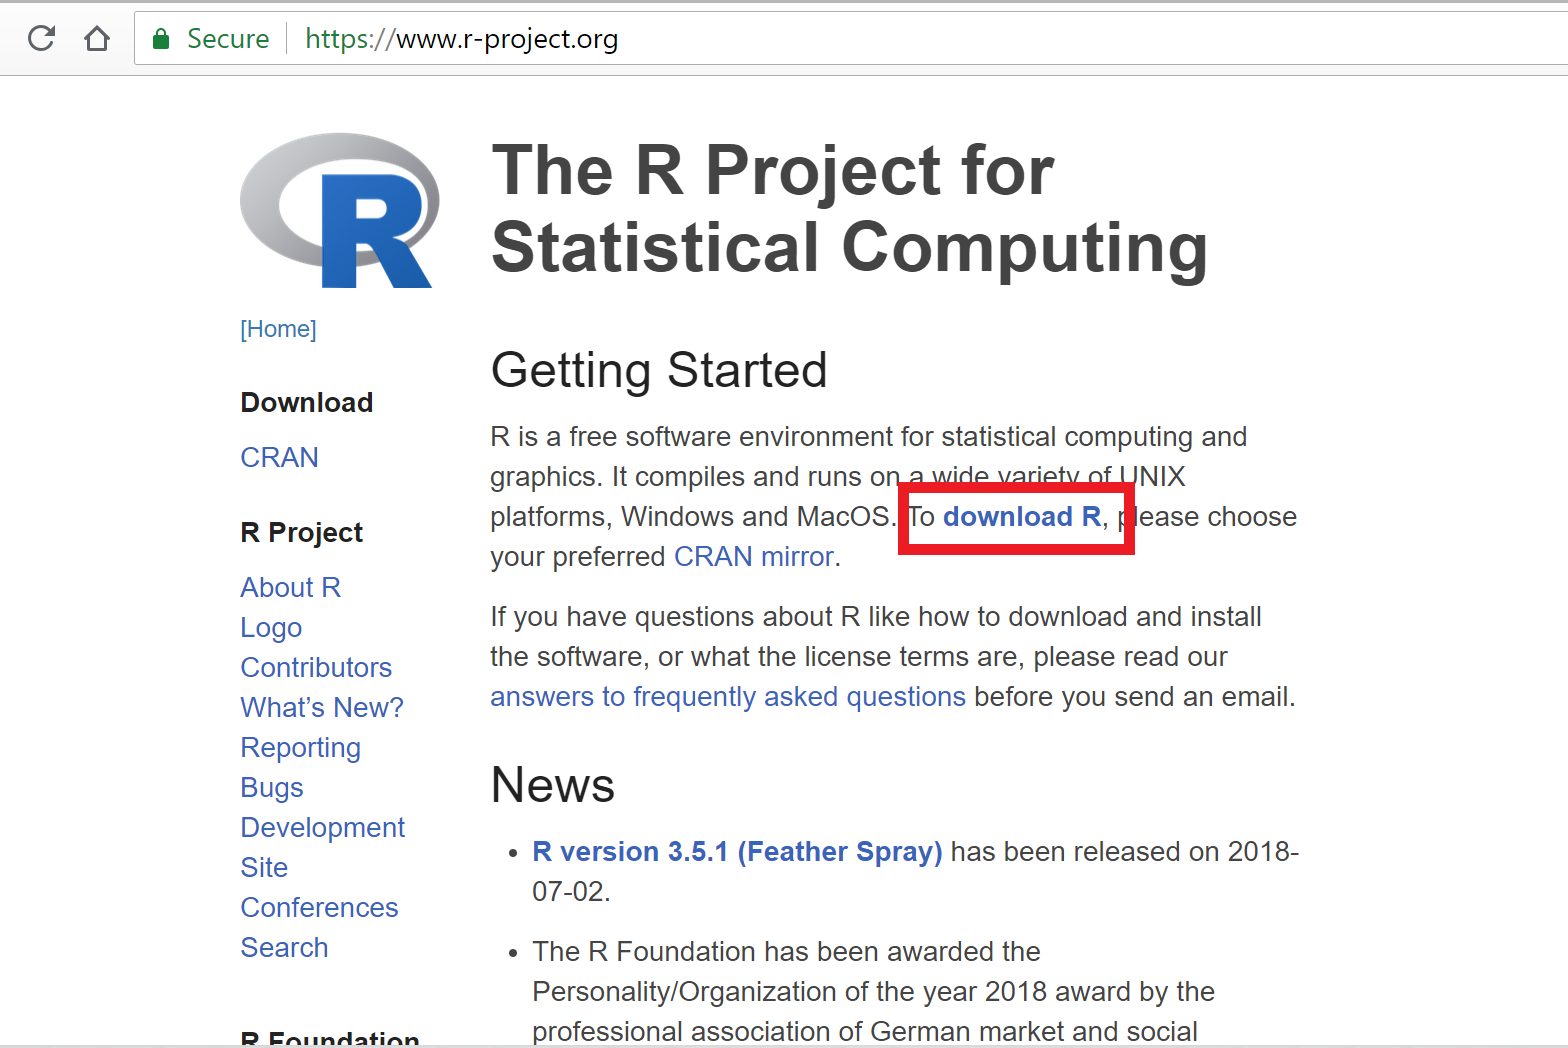
Figure 1: Step 1 Step 2: Click on the link for https://cloud.r-project.org/ which will choose the best server for you. (see Figure 2) 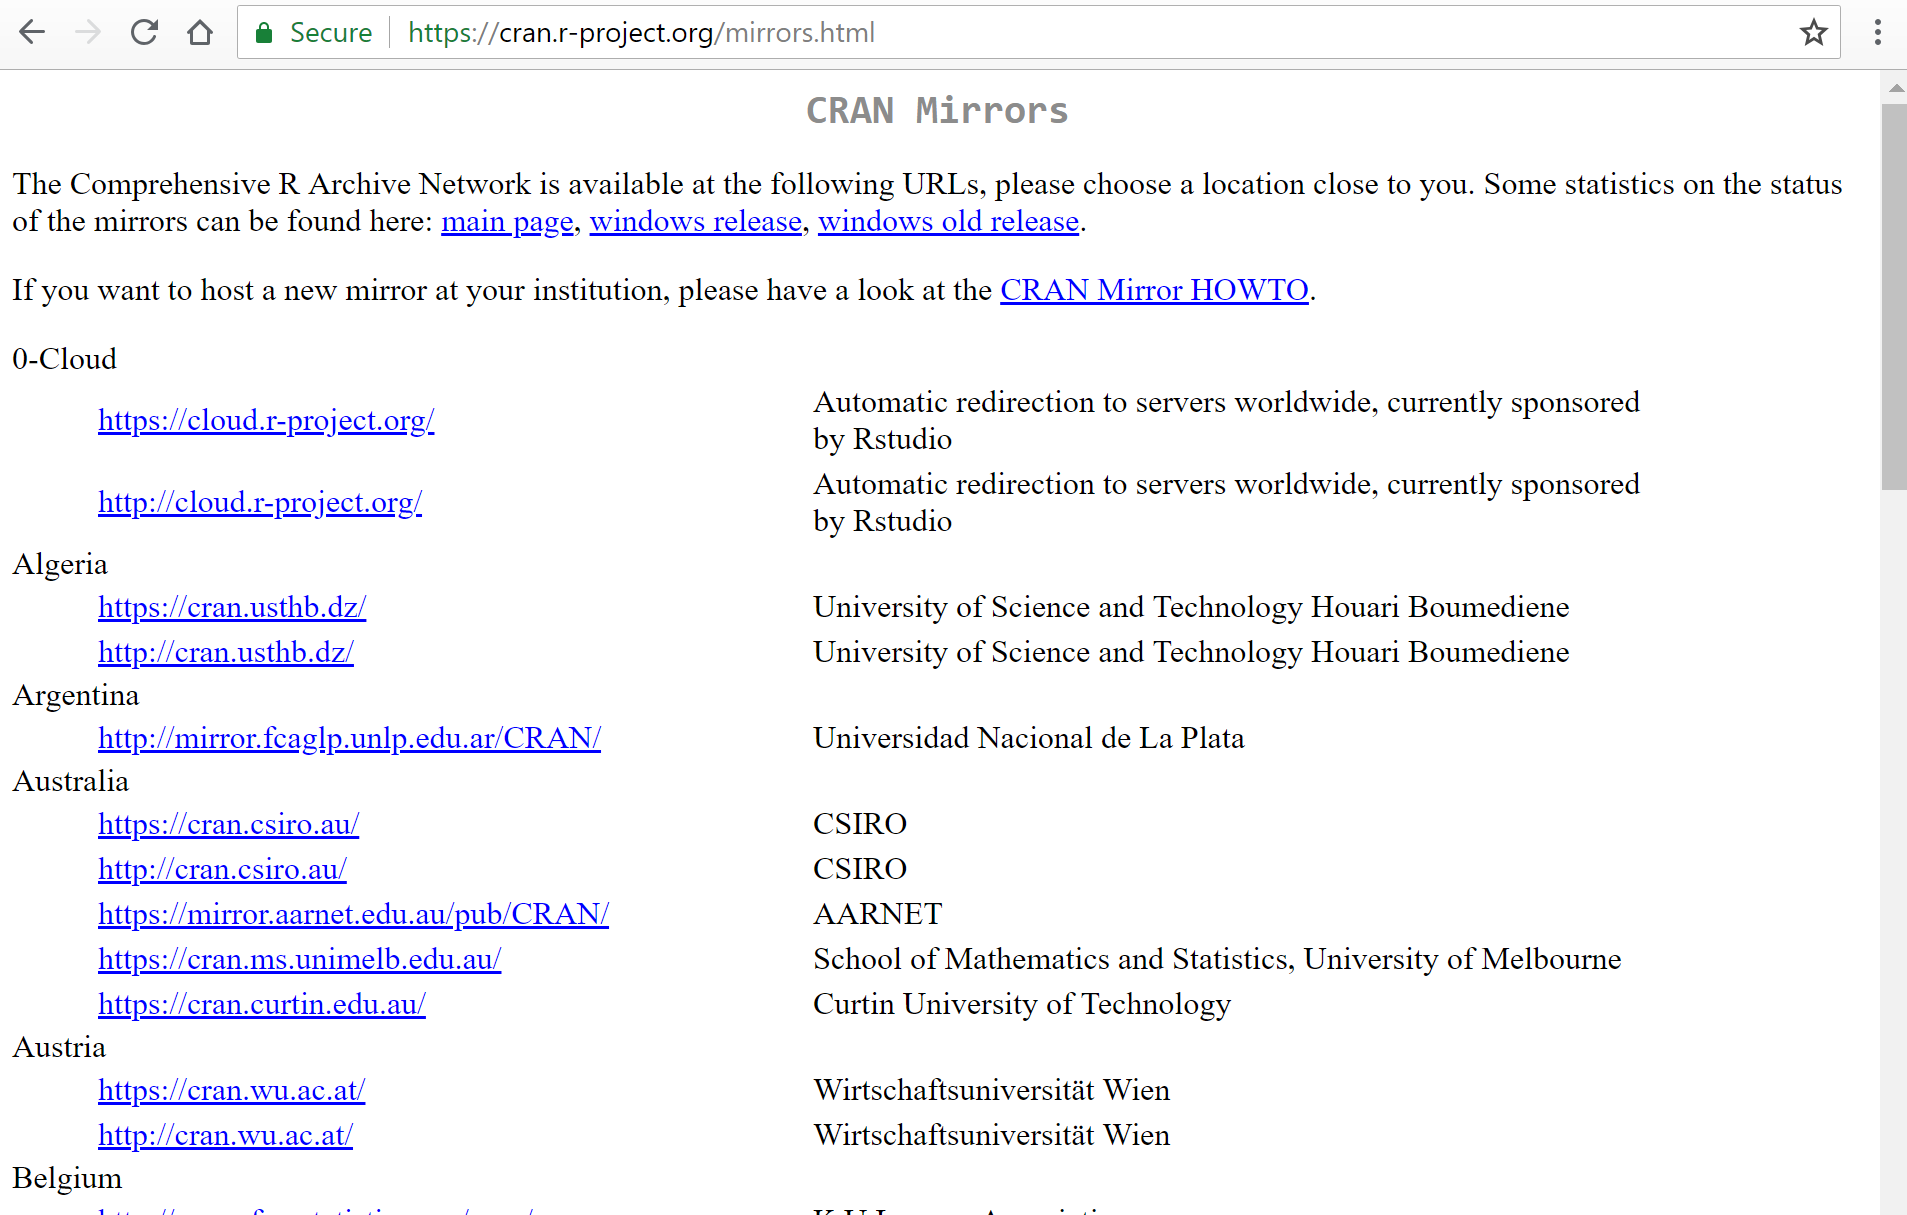
Figure 2: Step 2 Step 3: Click on ‘Download R for Windows’. (see Figure 3). 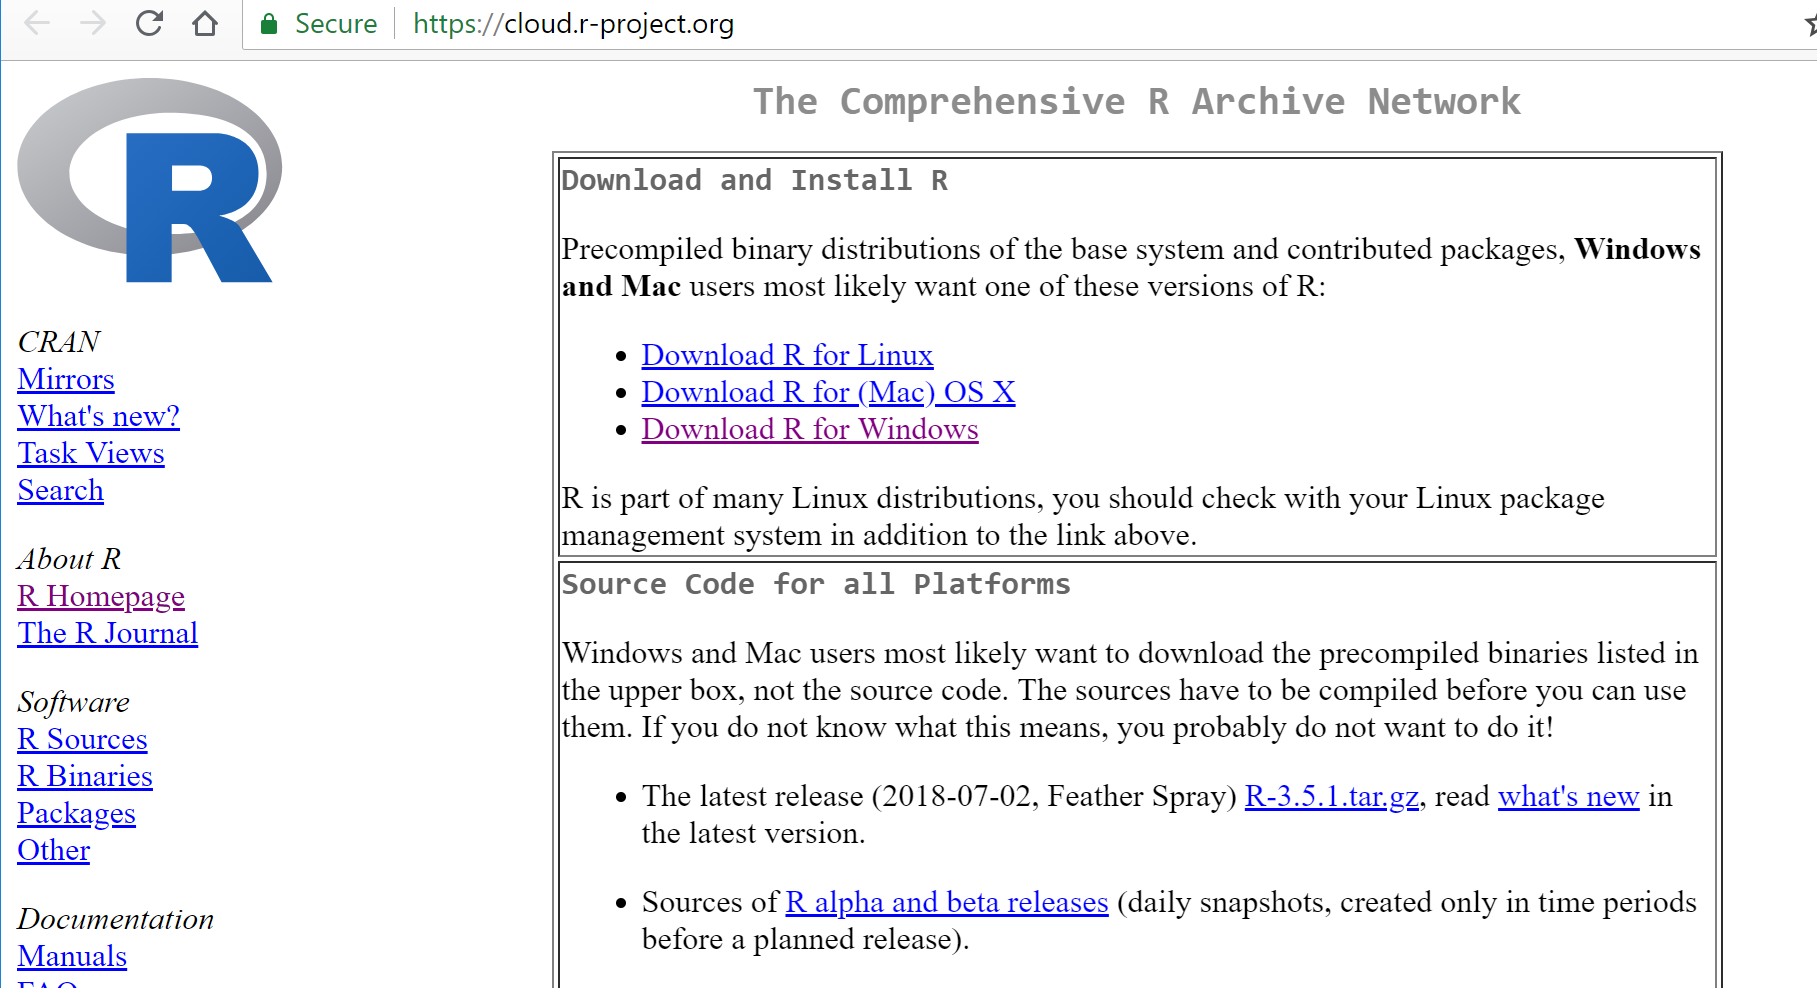
Figure 3: Step 3 Step 4: Click on ‘base’. (see Figure 4). 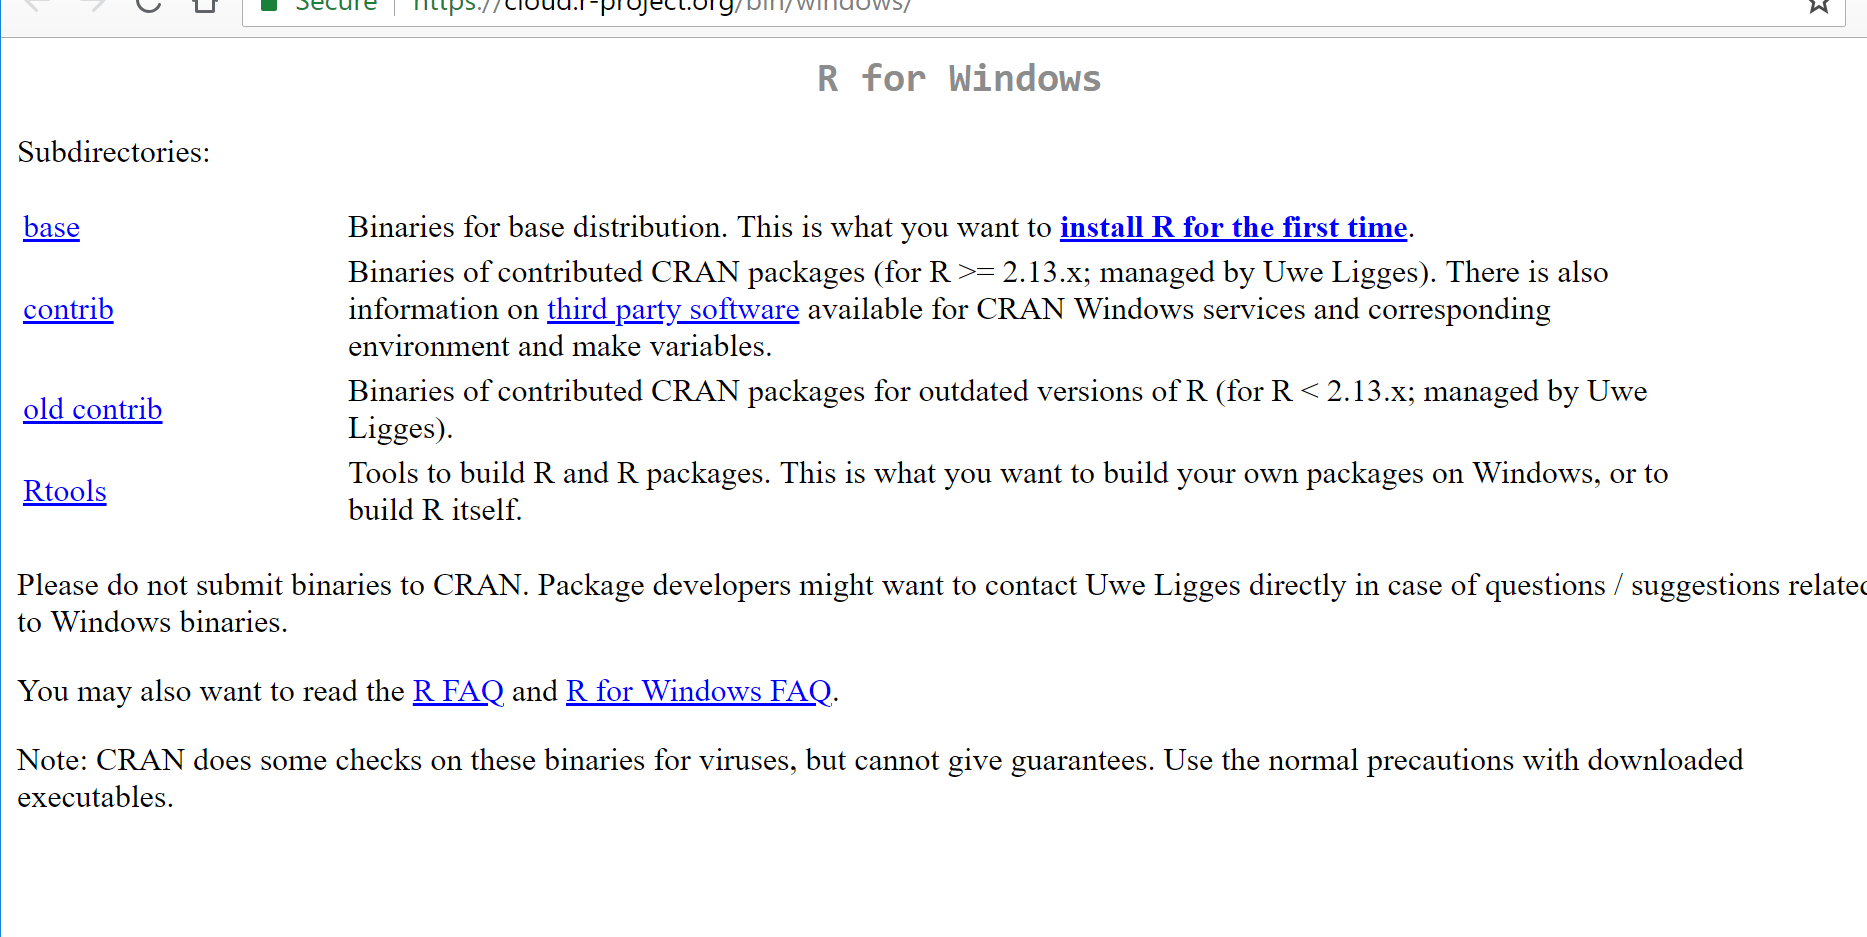
Figure 4: Step 4 Step 5: Click on ‘Download R 3.5.1 for Windows’ (this may have changed by the time you are reading this as R versions update regularly). (see Figure 5). 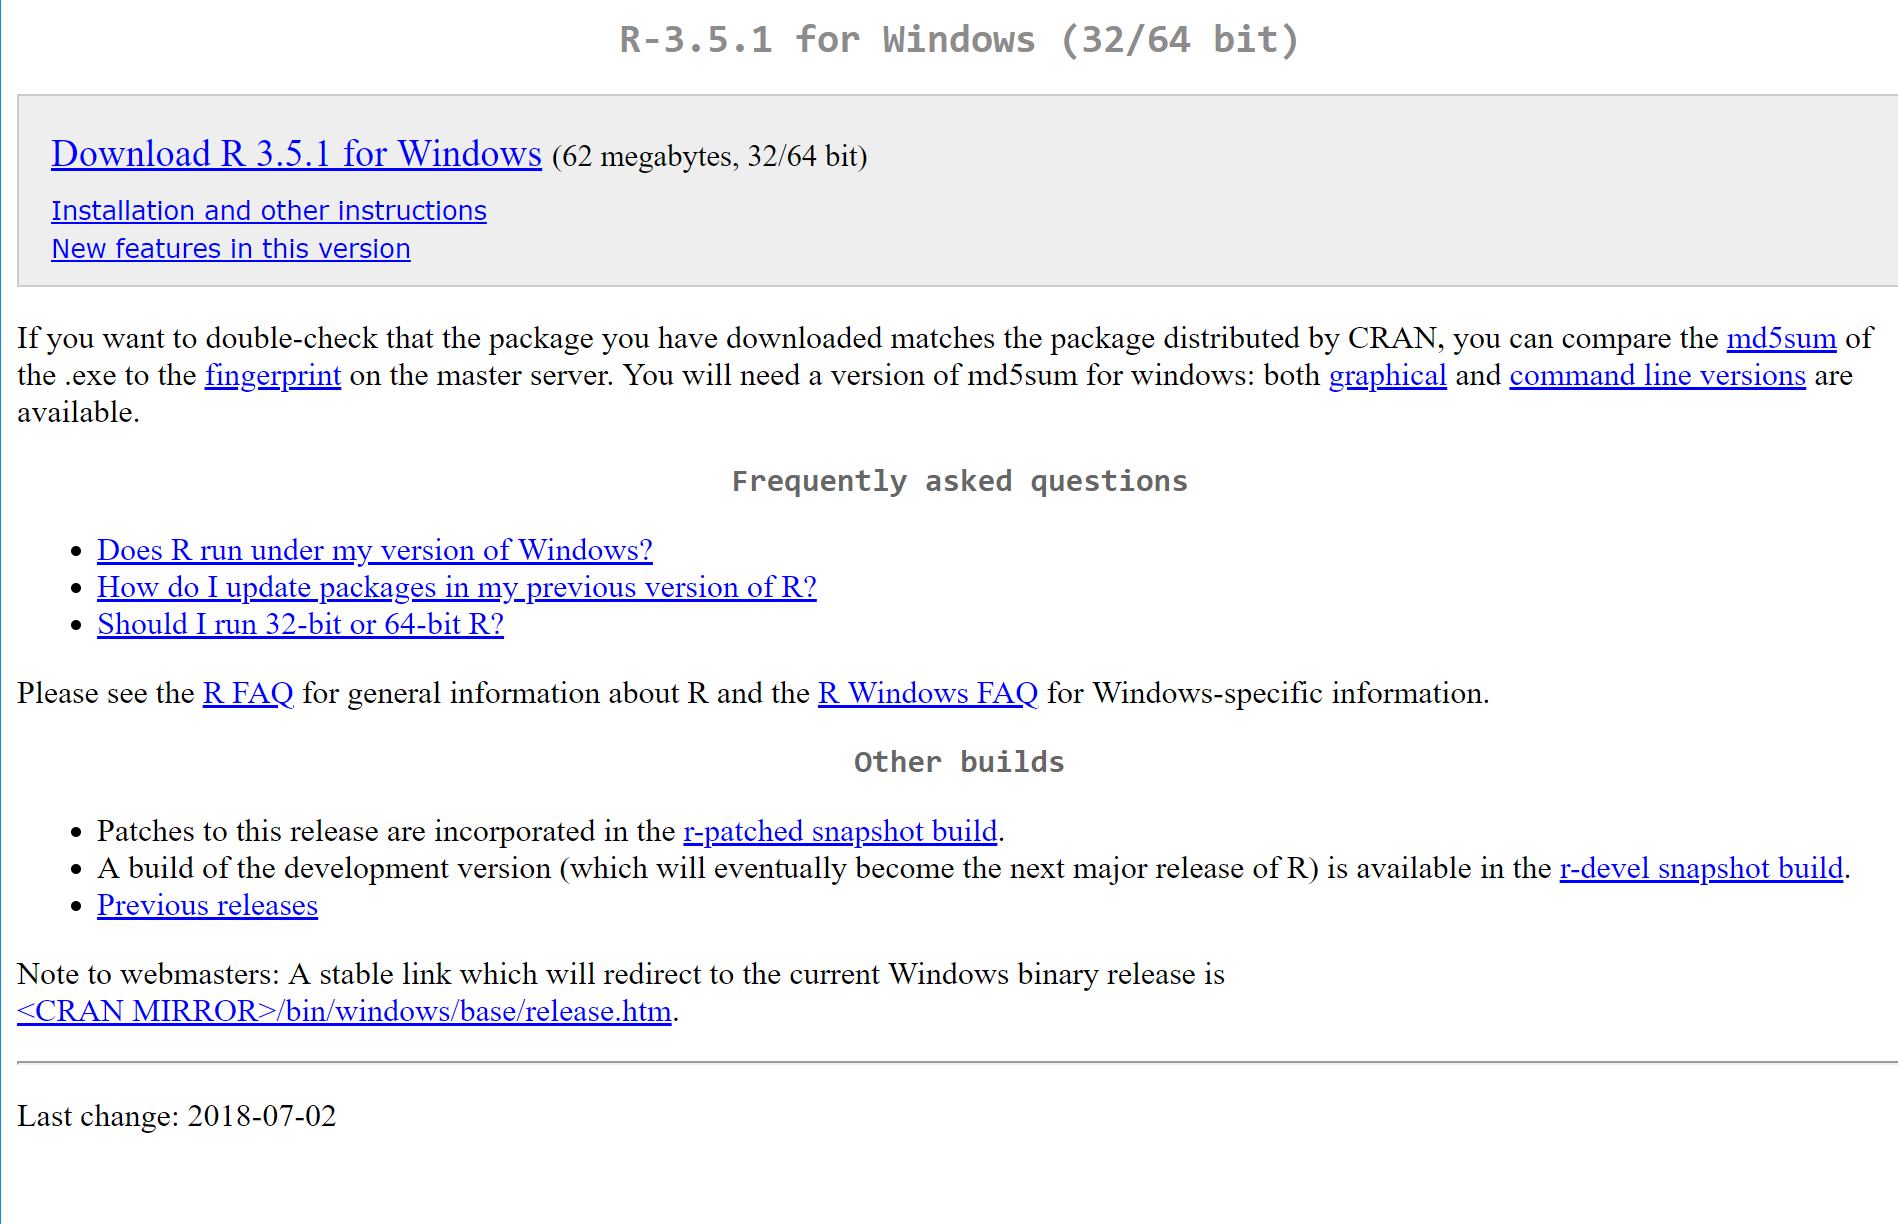
Figure 5: Step 5 Step 6: Depending on the browser you use, you will be given an option to save and/or open the file. What you need to do is
When run the file, you might see the following prompt. Click on Run. (see Figure 6). 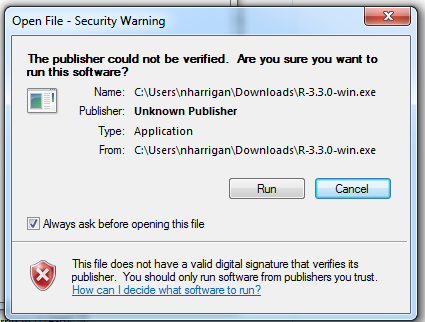
Figure 6: Step 6 Step 7: After clicking Run, you might see this screen. (see Figure 7). Click on Yes. 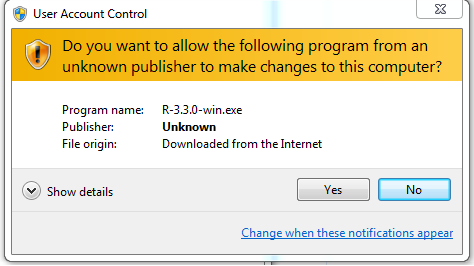
Figure 7: Step 7 Step 8: The installer will now ask you what language you want R to be in. The default is English. (see Figure 8). Select “OK” once you’re done choosing. 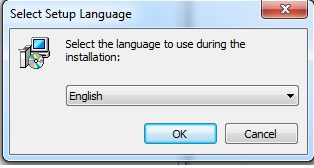
Figure 8: Step 7 Step 9: You will see an End-User Licence Agreement. (see Figure 9). Select Next. 
Figure 9: Step 9 Step 10: The default destination for R is fine, so just accept by clicking Next. (see Figure 10). 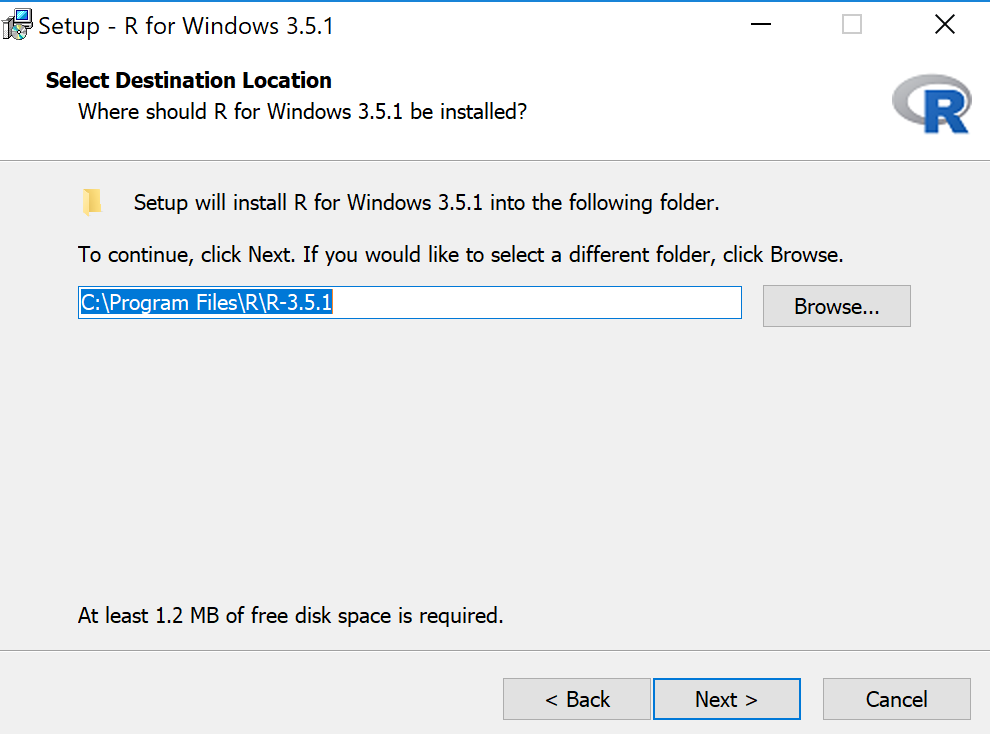
Figure 10: Step 10 Step 11: Again, the default components are fine, so click next to accept these. (see Figure 11). 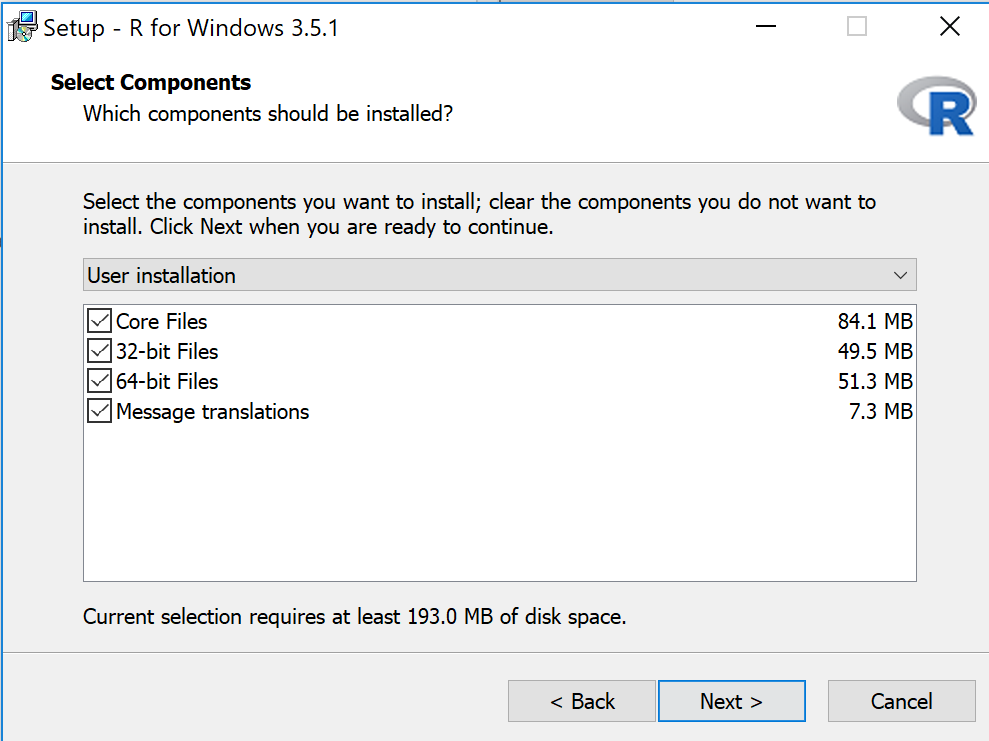
Figure 11: Step 11 Step 12: There is no need to customise start up, so simply click next and leave the option ‘No’ selected. (see Figure 12). 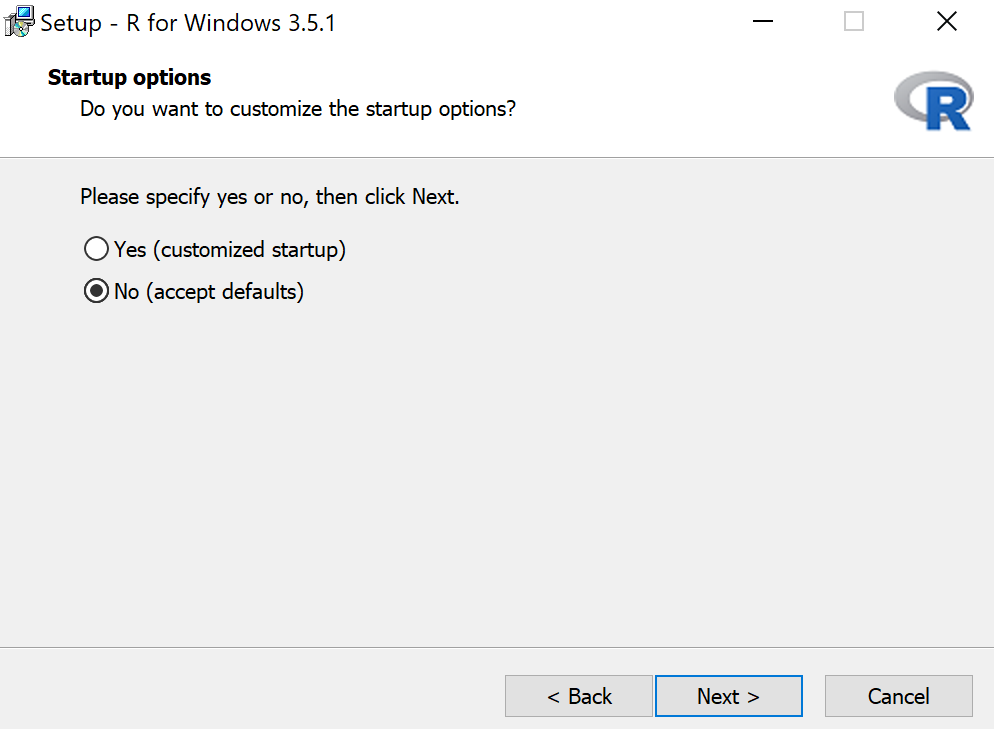
Figure 12: Step 12 Step 13: If you want to change the Start Menu folder you can do it here. Otherwise, simply press next. (see Figure 13). 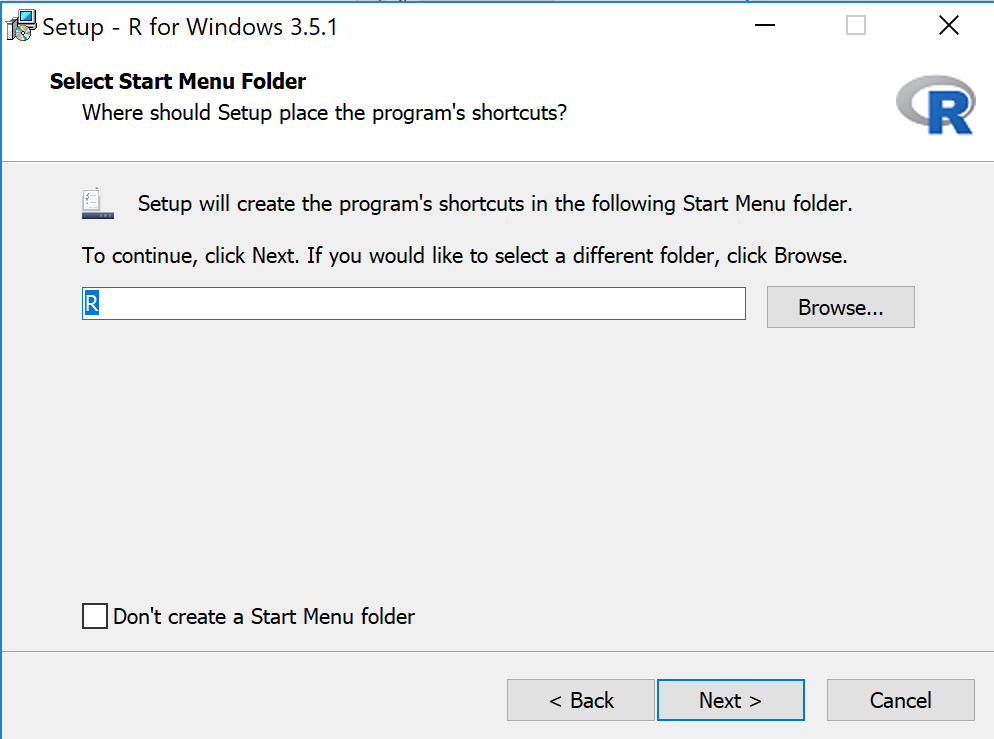
Figure 13: Step 13 Step 14: You may want to add a desktop shortcut or quick launch shortcut. Feel free to. Please leave the other two boxes selected. Click Next. (see Figure 14). 
Figure 14: Step 14 Step 15: You will see the following window as R is installed. (see Figure 15). 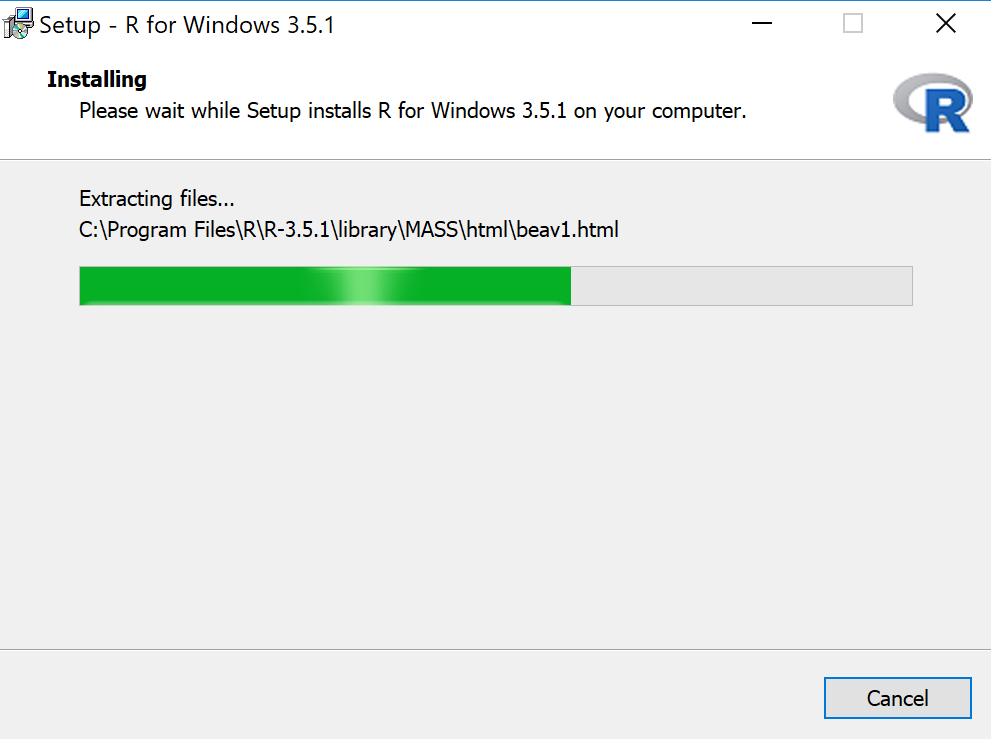
Figure 15: Step 15 Step 16: You will see a window like this when R has finished installing. Simply click Finish. (see Figure 16). 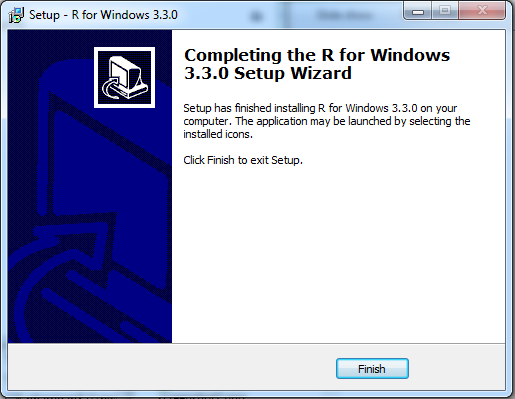
Figure 16: Step 16 |
2. Installing R Studio – Windows Instructions |
|
Step 1: After making sure that R is installed, go to https://www.rstudio.com/. Step 2: Mouse over “Products” and from the dropdown menu select “RStudio”. (see Figure 17). 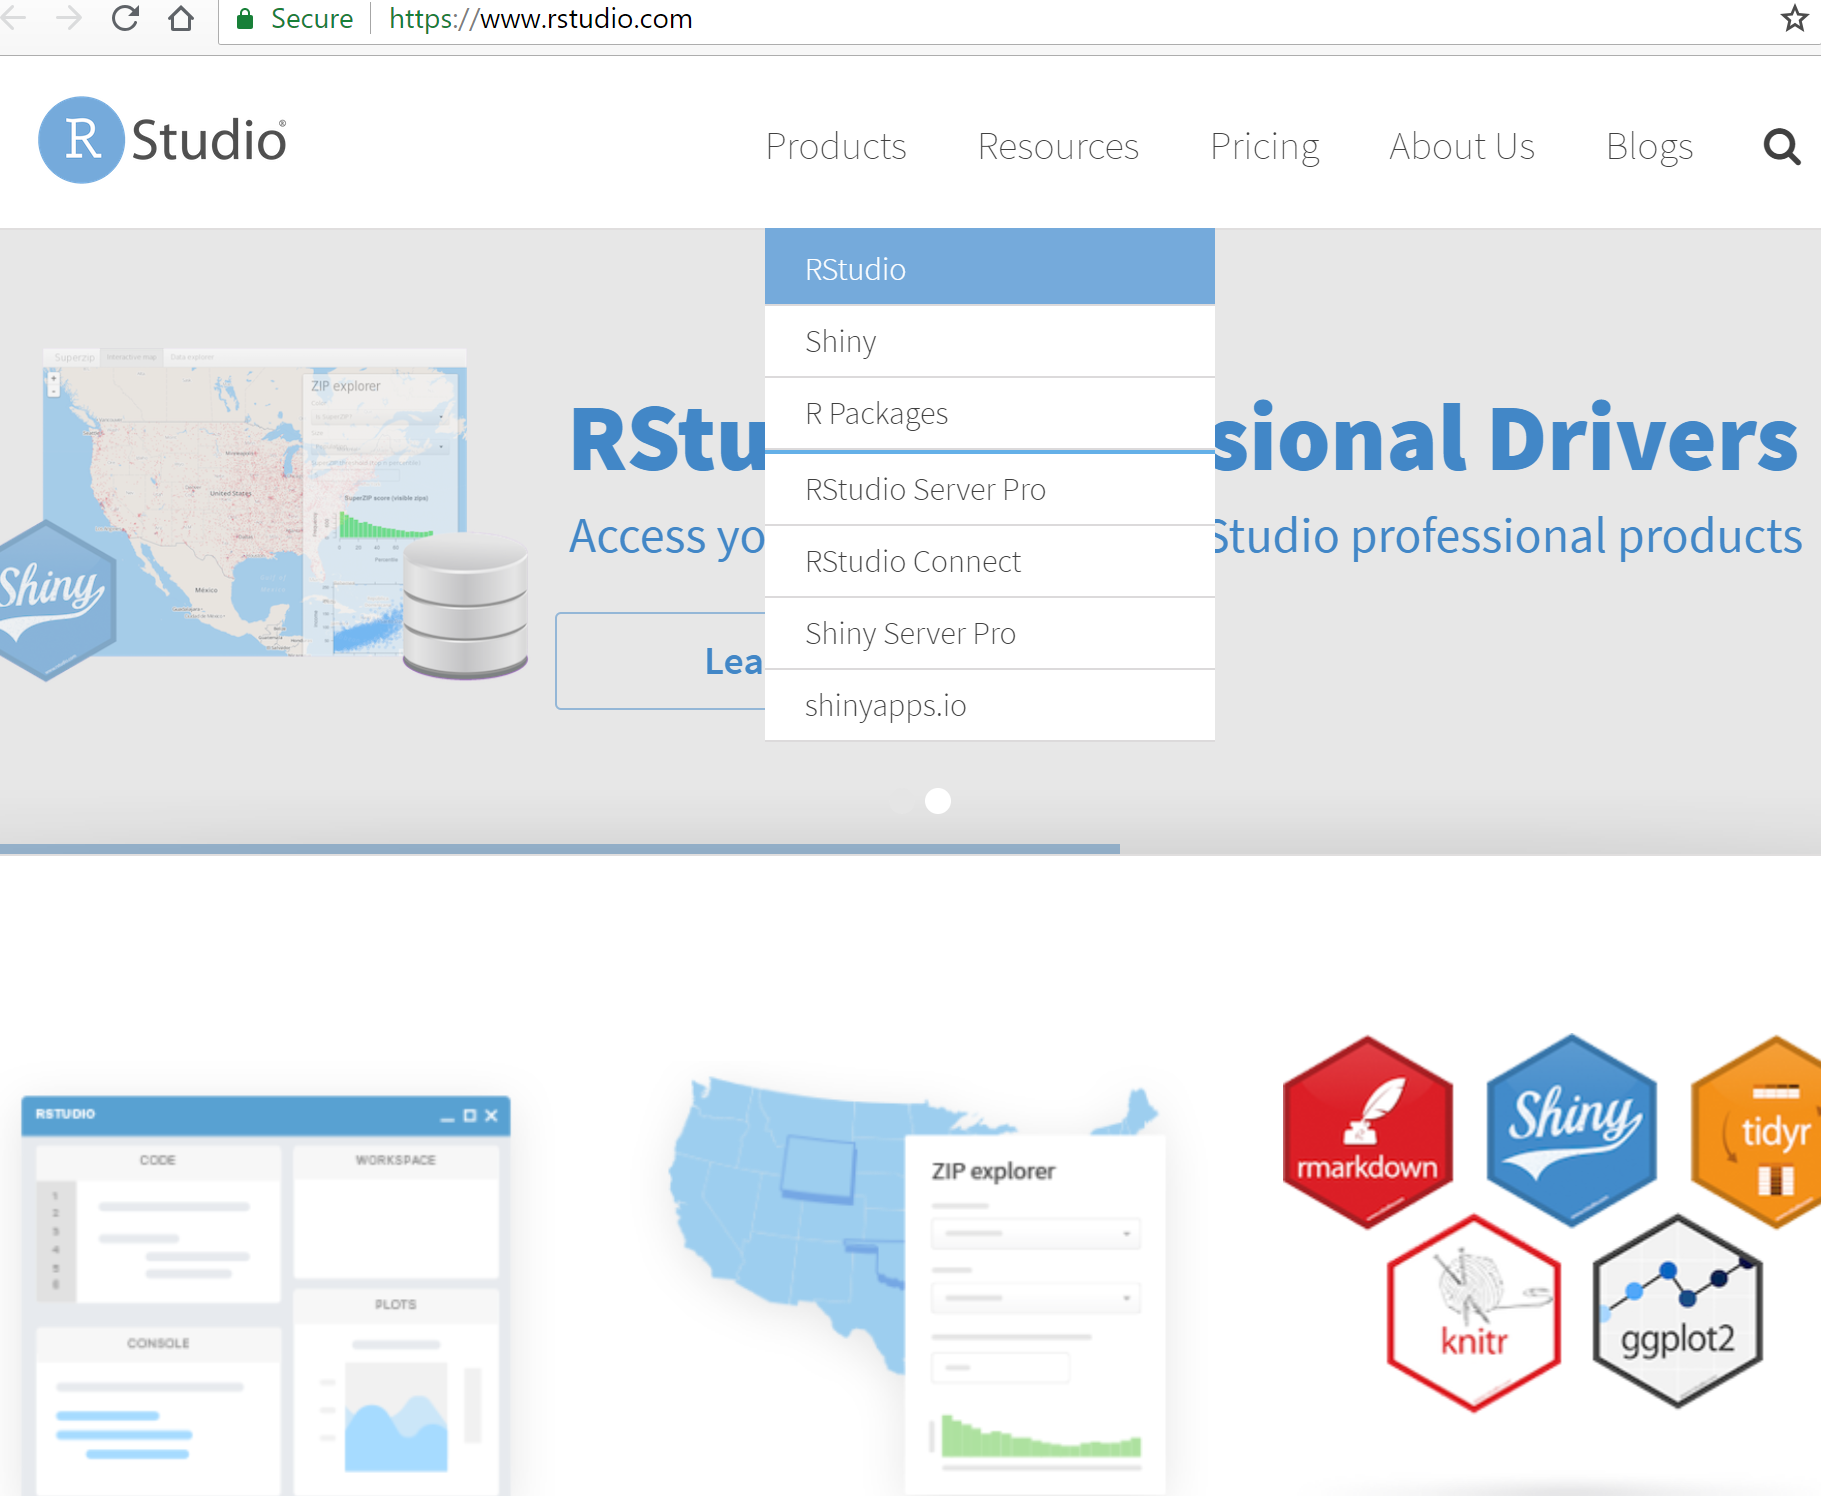
Figure 17: Step 2 Step 3: When you reach the next page, scroll down until you see the button “Download RStudio Desktop”. Click this icon. (see Figure 18). 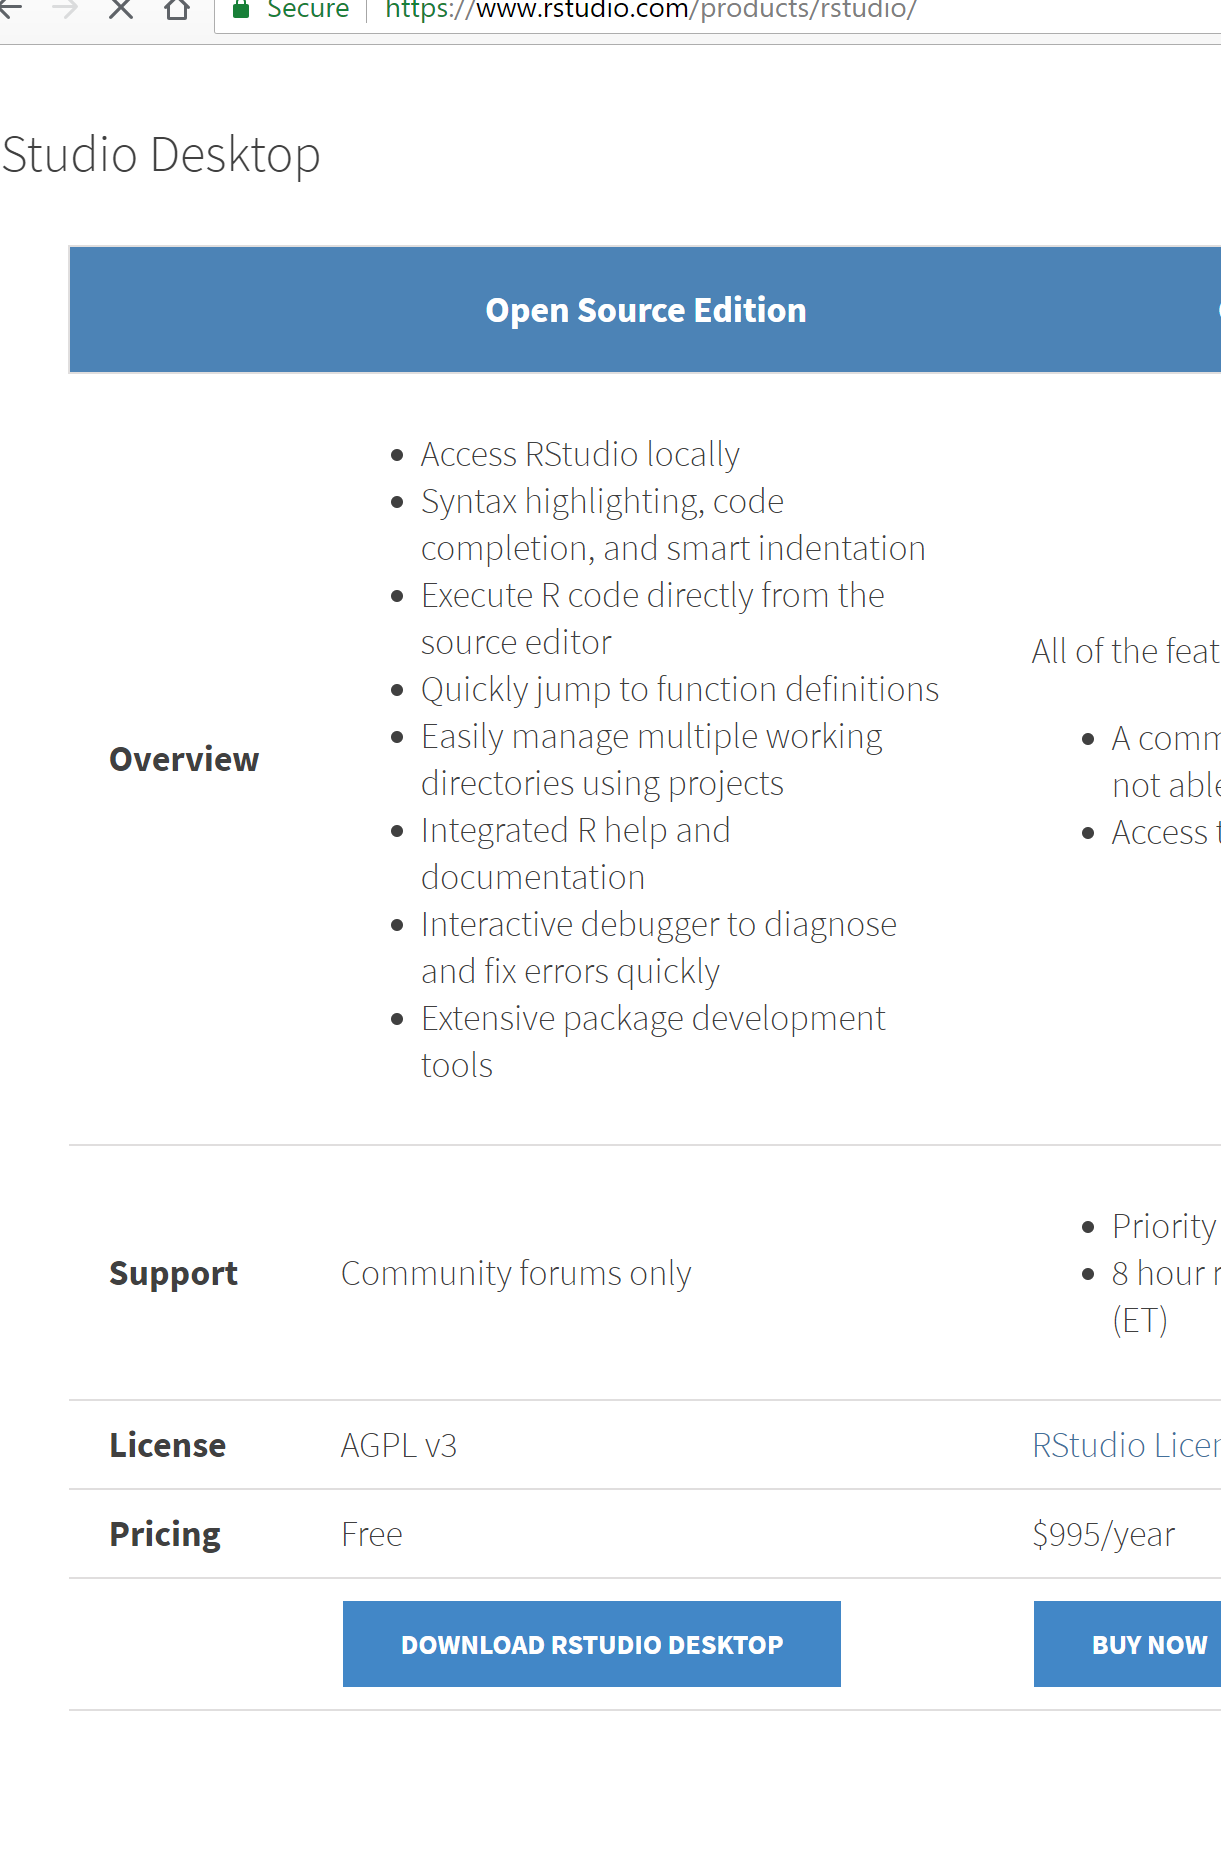
Figure 18: Step 3 Step 4: When you reach the next page, scroll down until you see “Installers for Supported Platforms”. For windows, select the first one, which ends with the text “- Windows Vista/7/8/10”. (see Figure 19). 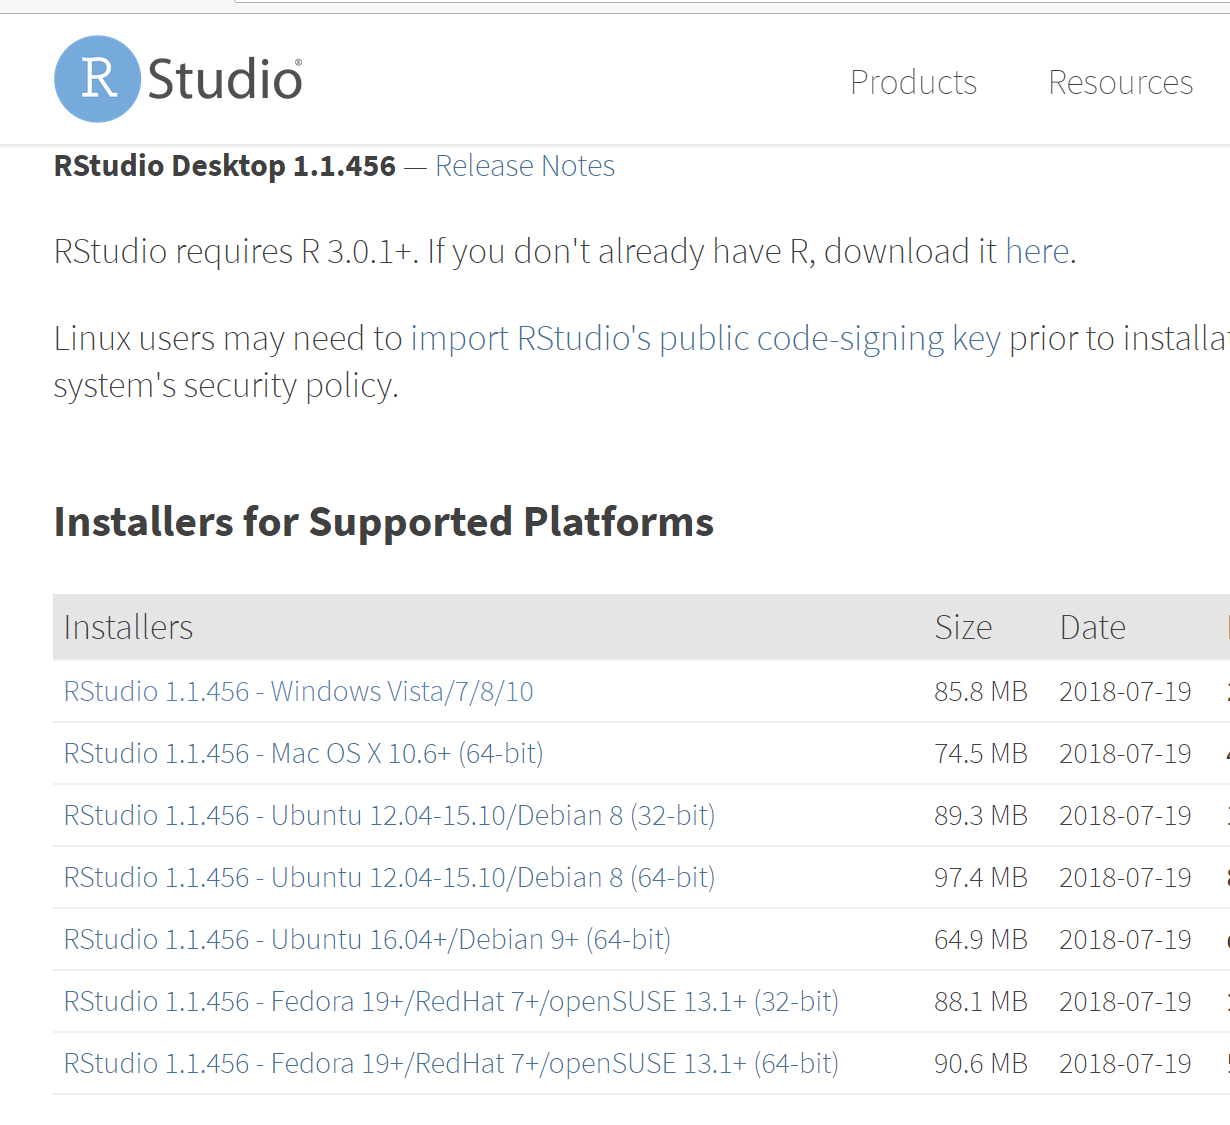
Figure 19: Step 4 Step 5: This will download a .exe file to your computer. In Chrome browser the file will appear at the bottom of your browser like the screenshot below. Once this file is downloaded, double click on it to open it. (see Figure 20). 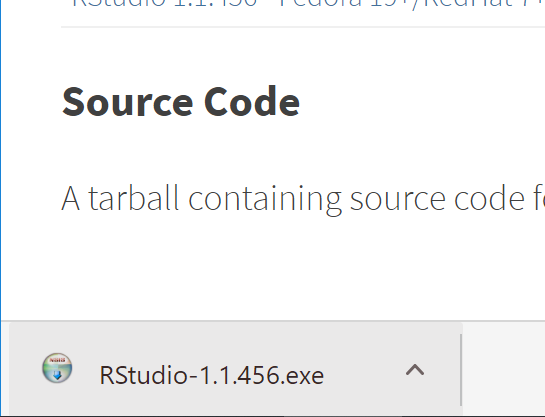
Figure 20: Step 5 Step 6: Follow the instructions to set up RStudio. The default settings for RStudio are the ones that you should choose. You may want to create an RStudio icon on your desktop and/or Taskbar. |
3. Installing R - Mac Instructions |
Written instructions with screenshots
Step 1: Go to https://www.r-project.org/. You should see the screen below. Click on the “download R” hyperlink. (see Figure 21).
Figure 21: Step 1 Step 2: Click on the link for https://cloud.r-project.org/ which will choose the best server for you. (see Figure 22).
Figure 22: Step 2 Step 3: Click on "Download R for Mac (OS X). (see Figure 23). 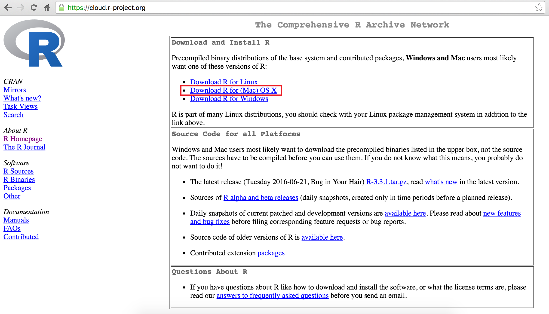
Figure 23: Step 3 Step 4: Click on “R - 3.6.1 pkg” (or the most recent version) (see Figure 24). 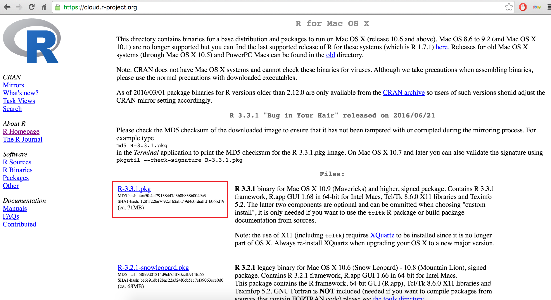
Figure 24: Step 4 Step 5: A download prompt will appear at the bottom of your screen. Click “Keep”. (see Figure 25). 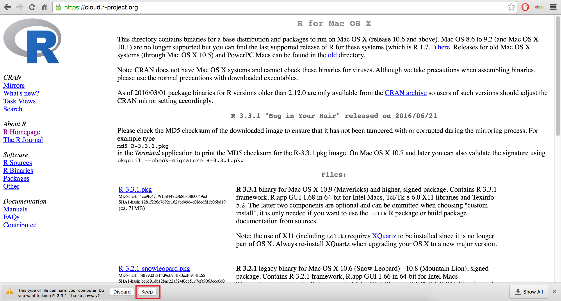
Figure 25: Step 5 Step 6: Wait for the file to finish downloading. When the download ends, it will appear in the popup at the bottom of the screen. Double click on it. (see Figure 26). 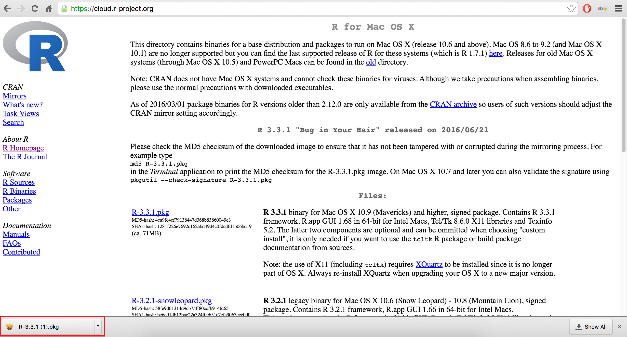
Figure 26: Step 6 Step 7: The R installer will open. Click “Continue”. (see Figure 27). 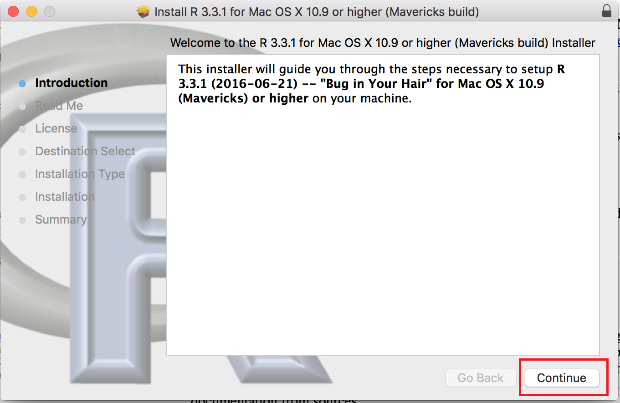
Figure 27: Step 7 Step 8: The readme will appear. Click “Continue”. (see Figure 28). 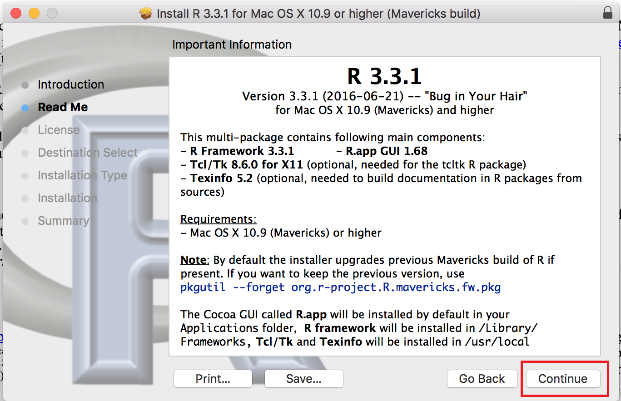
Figure 28: Step 8 Step 9: The license terms will appear. Click “Continue”. (see Figure 29). 
Figure 29: Step 9 Step 10: Click “Agree” in the popup that appears. (see Figure 30). 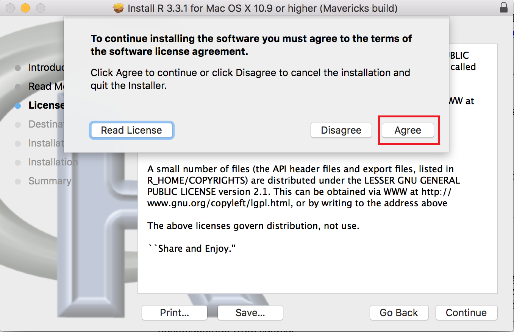
Figure 30: Step 10 Step 11: Select either option here. In this case I’m installing for all users of the computer. (see Figure 31). 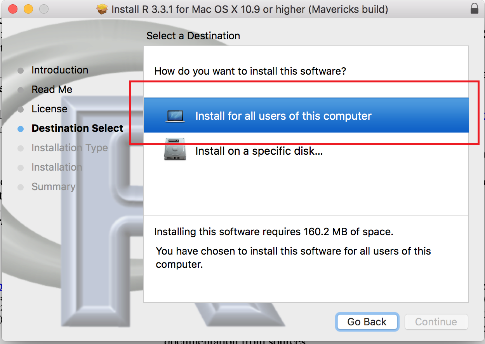
Figure 31: Step 11 Step 12: In either case, click “Continue”. (see Figure 32). 
Figure 32: Step 12 Step 13: Click “Install”. (see Figure 33). 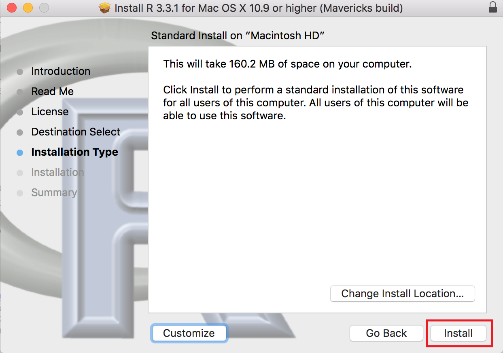
Figure 33: Step 13 Step 14: Wait for the install to finish, and it’s done. (see Figure 34). 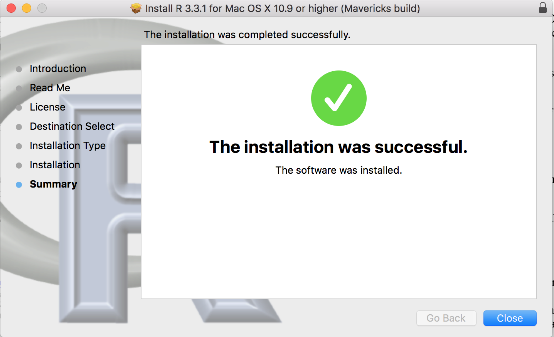
Figure 34: Step 14 |
4. Installing R Studio – Mac Instructions |
|
Step 1: After making sure that R is installed, go to https://www.rstudio.com/. (see Step 2: Mouse over “Products” and from the dropdown menu select “RStudio”. (see Figure 35).
Figure 35: Step 2 Step 3: When you reach the next page, scroll down until you see the button “Download RStudio Desktop”. Click this icon. (see Figure 36).
Figure 36: Step 3 Step 4: Click on the highlighted link (it should say that it’s the Mac version). (see Figure 37). 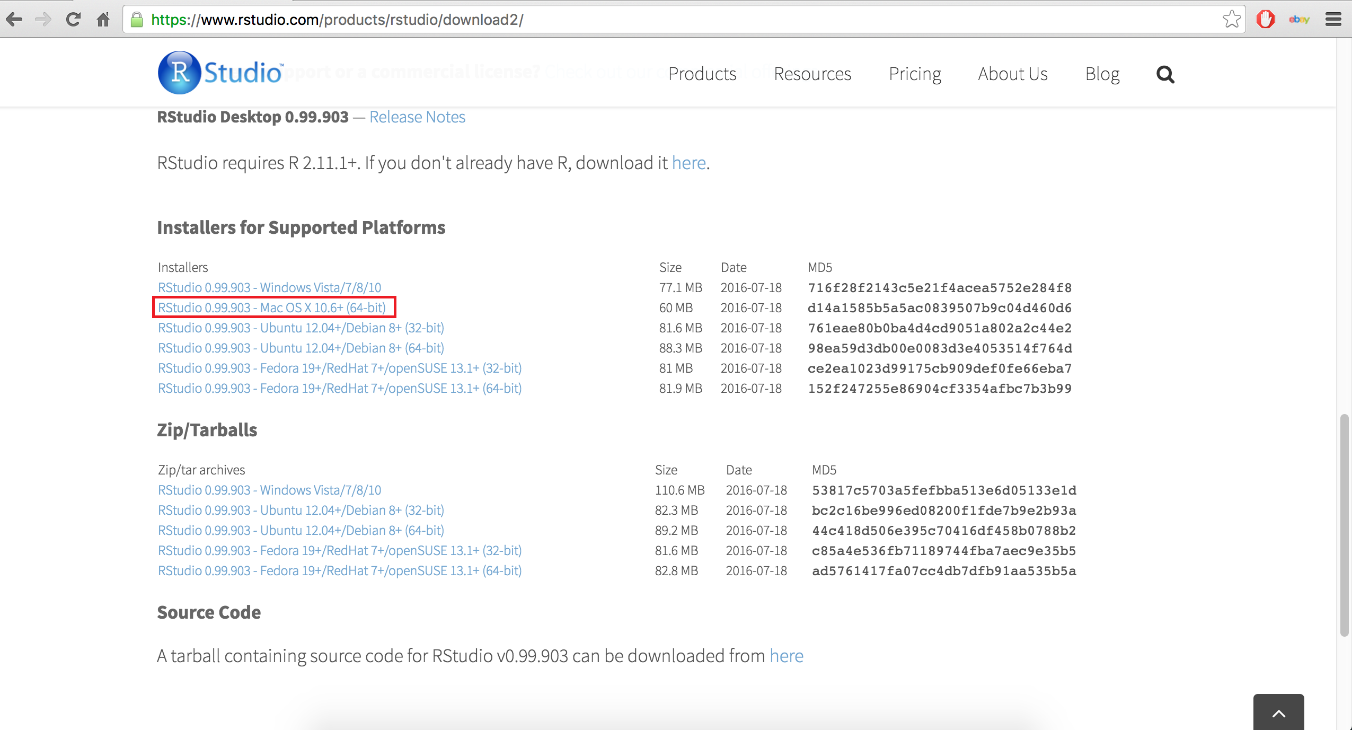
Figure 37: Step 4 Step 5: A popup will appear at the bottom of your screen indicating the download progress. Wait for this to end. (see Figure 38). 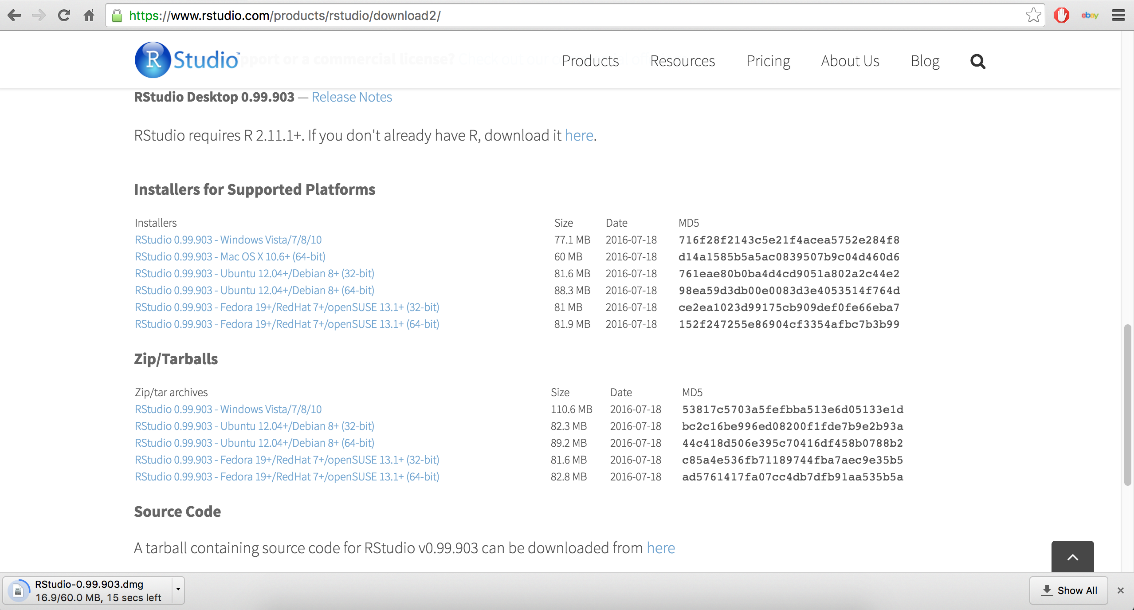
Figure 38: Step 5 Step 6: When the file download is finished, double click on the file icon in the bar at the bottom of the screen. (see Figure 39). 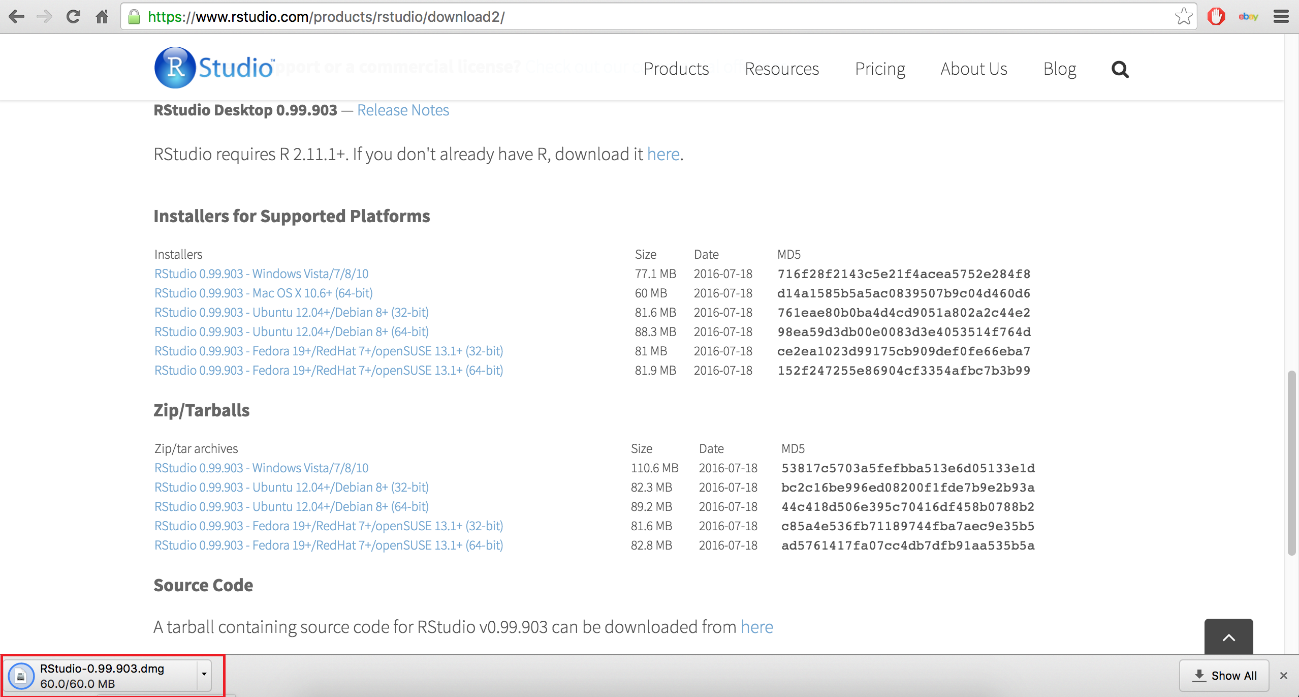
Figure 39: Step 6 Step 7: This dialog will open up. Allow it to finish installing. (see Figure 40). 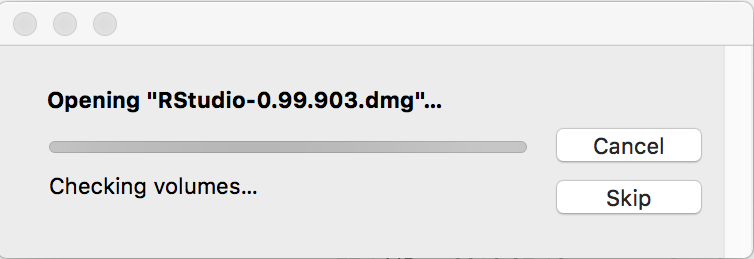
Figure 40: Step 7 |