- Lecture Slides
- Video Lecture (from 2019)
- Introduction
- Resources
- Dedoose Terminology
- Step 1: Create an account
- Step 2: Login - you may need to enable Flash
- Step 3: The Homepage
- Step 4: Create a Project
- Step 5: Import media
- Step 6: Create a code
- Step 7: Highlight excerpts + code data
- Step 8: Write a memo
- Step 9: Export excerpts
Lecture Slides
Video Lecture (from 2019)
Introduction
While many qualitative researchers use nothing more that a word processor, there are not a large number of advanced software tools that can assist with complex qualitative analysis.
The formal name for this software is Qualitative Data Analysis Software. The most popular programs are Dedoose, ATLAS.ti, MaxQDA, and NVivo.
A useful overview of the pros and cons of these four software can be found in this presentation by Josue Melendez Rodriguez.
This lesson (SOC224: Qualitative Analysis (Dedoose)) focuses on a basic introduction to Dedoose.
The main advantages of Dedoose are:
- the interface is relatively intuitive
- it allows large teams to cooperate easily
- it is internet based, so there is no software to install, and it can be used from any computer
- the charges are monthly - around $12/month - and their is no charge when inactive. This in comparison to more than A$1000 for an NVivo licence.
- you can sign up for a one month free trial, which is about as long as you would need for a simple in-class project.
Resources
This page is a very short introduction. If you want more information or help, I recommend the following resources:
Dedoose Terminology
Dedoose uses certain words to mean very specific things. Be aware of the following terms:
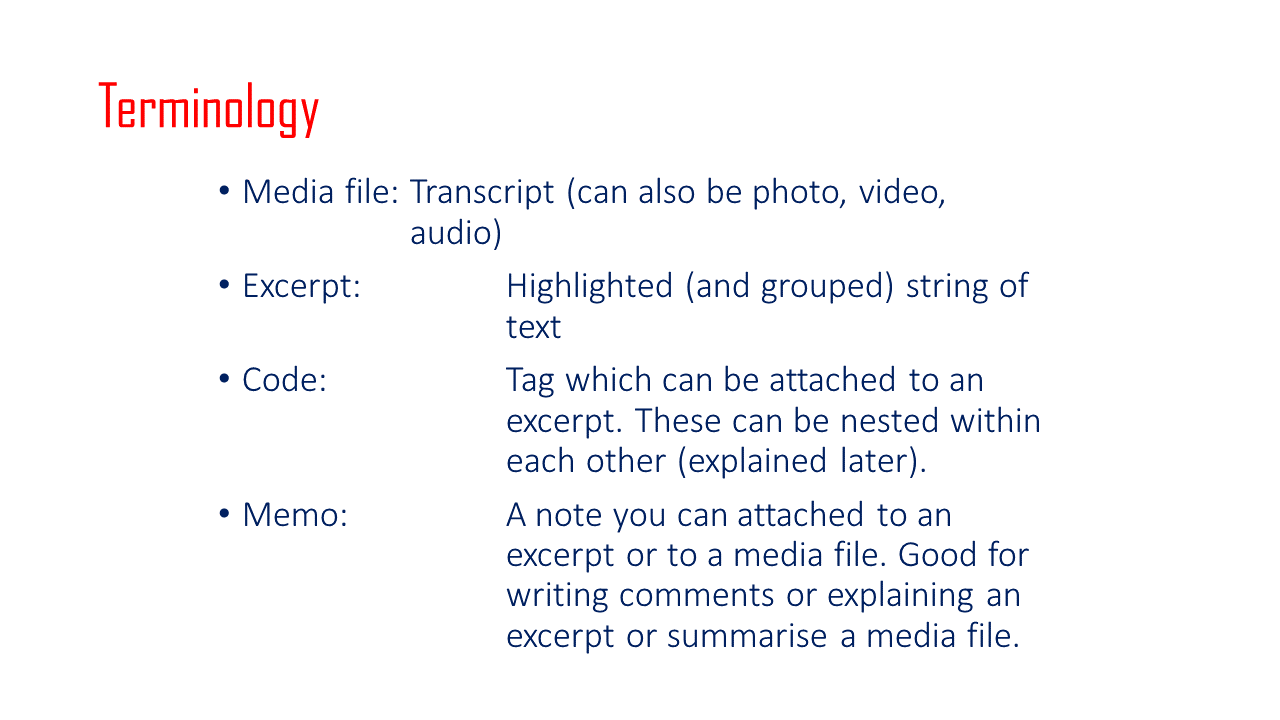
Figure 1: Terminology.
Step 1: Create an account
Go to dedoose.com and click ‘sign-up’ to create your own account.
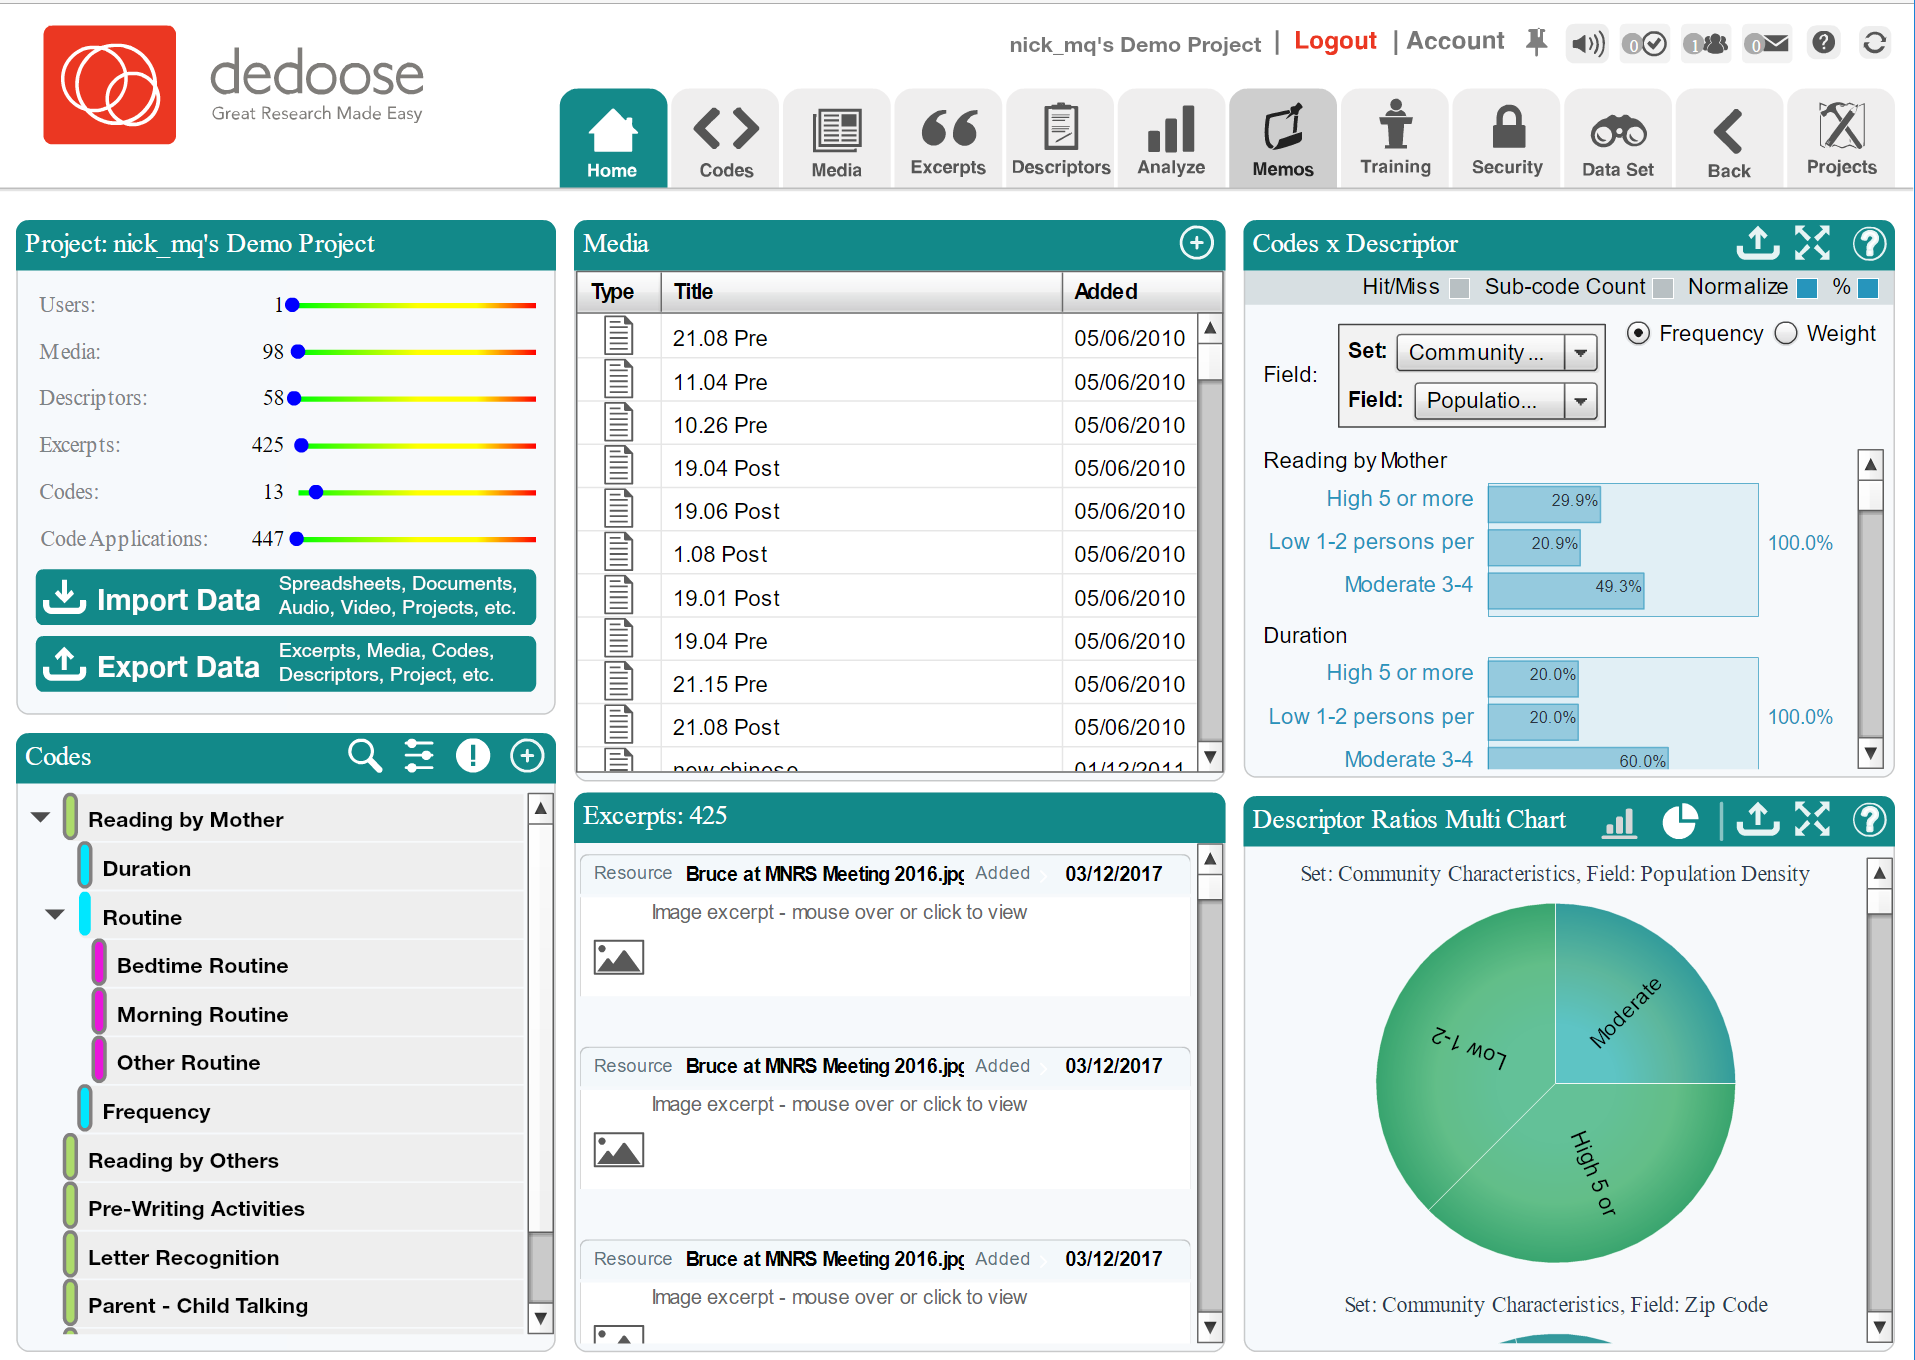
Figure 2: On the homepage, click ‘signup’.
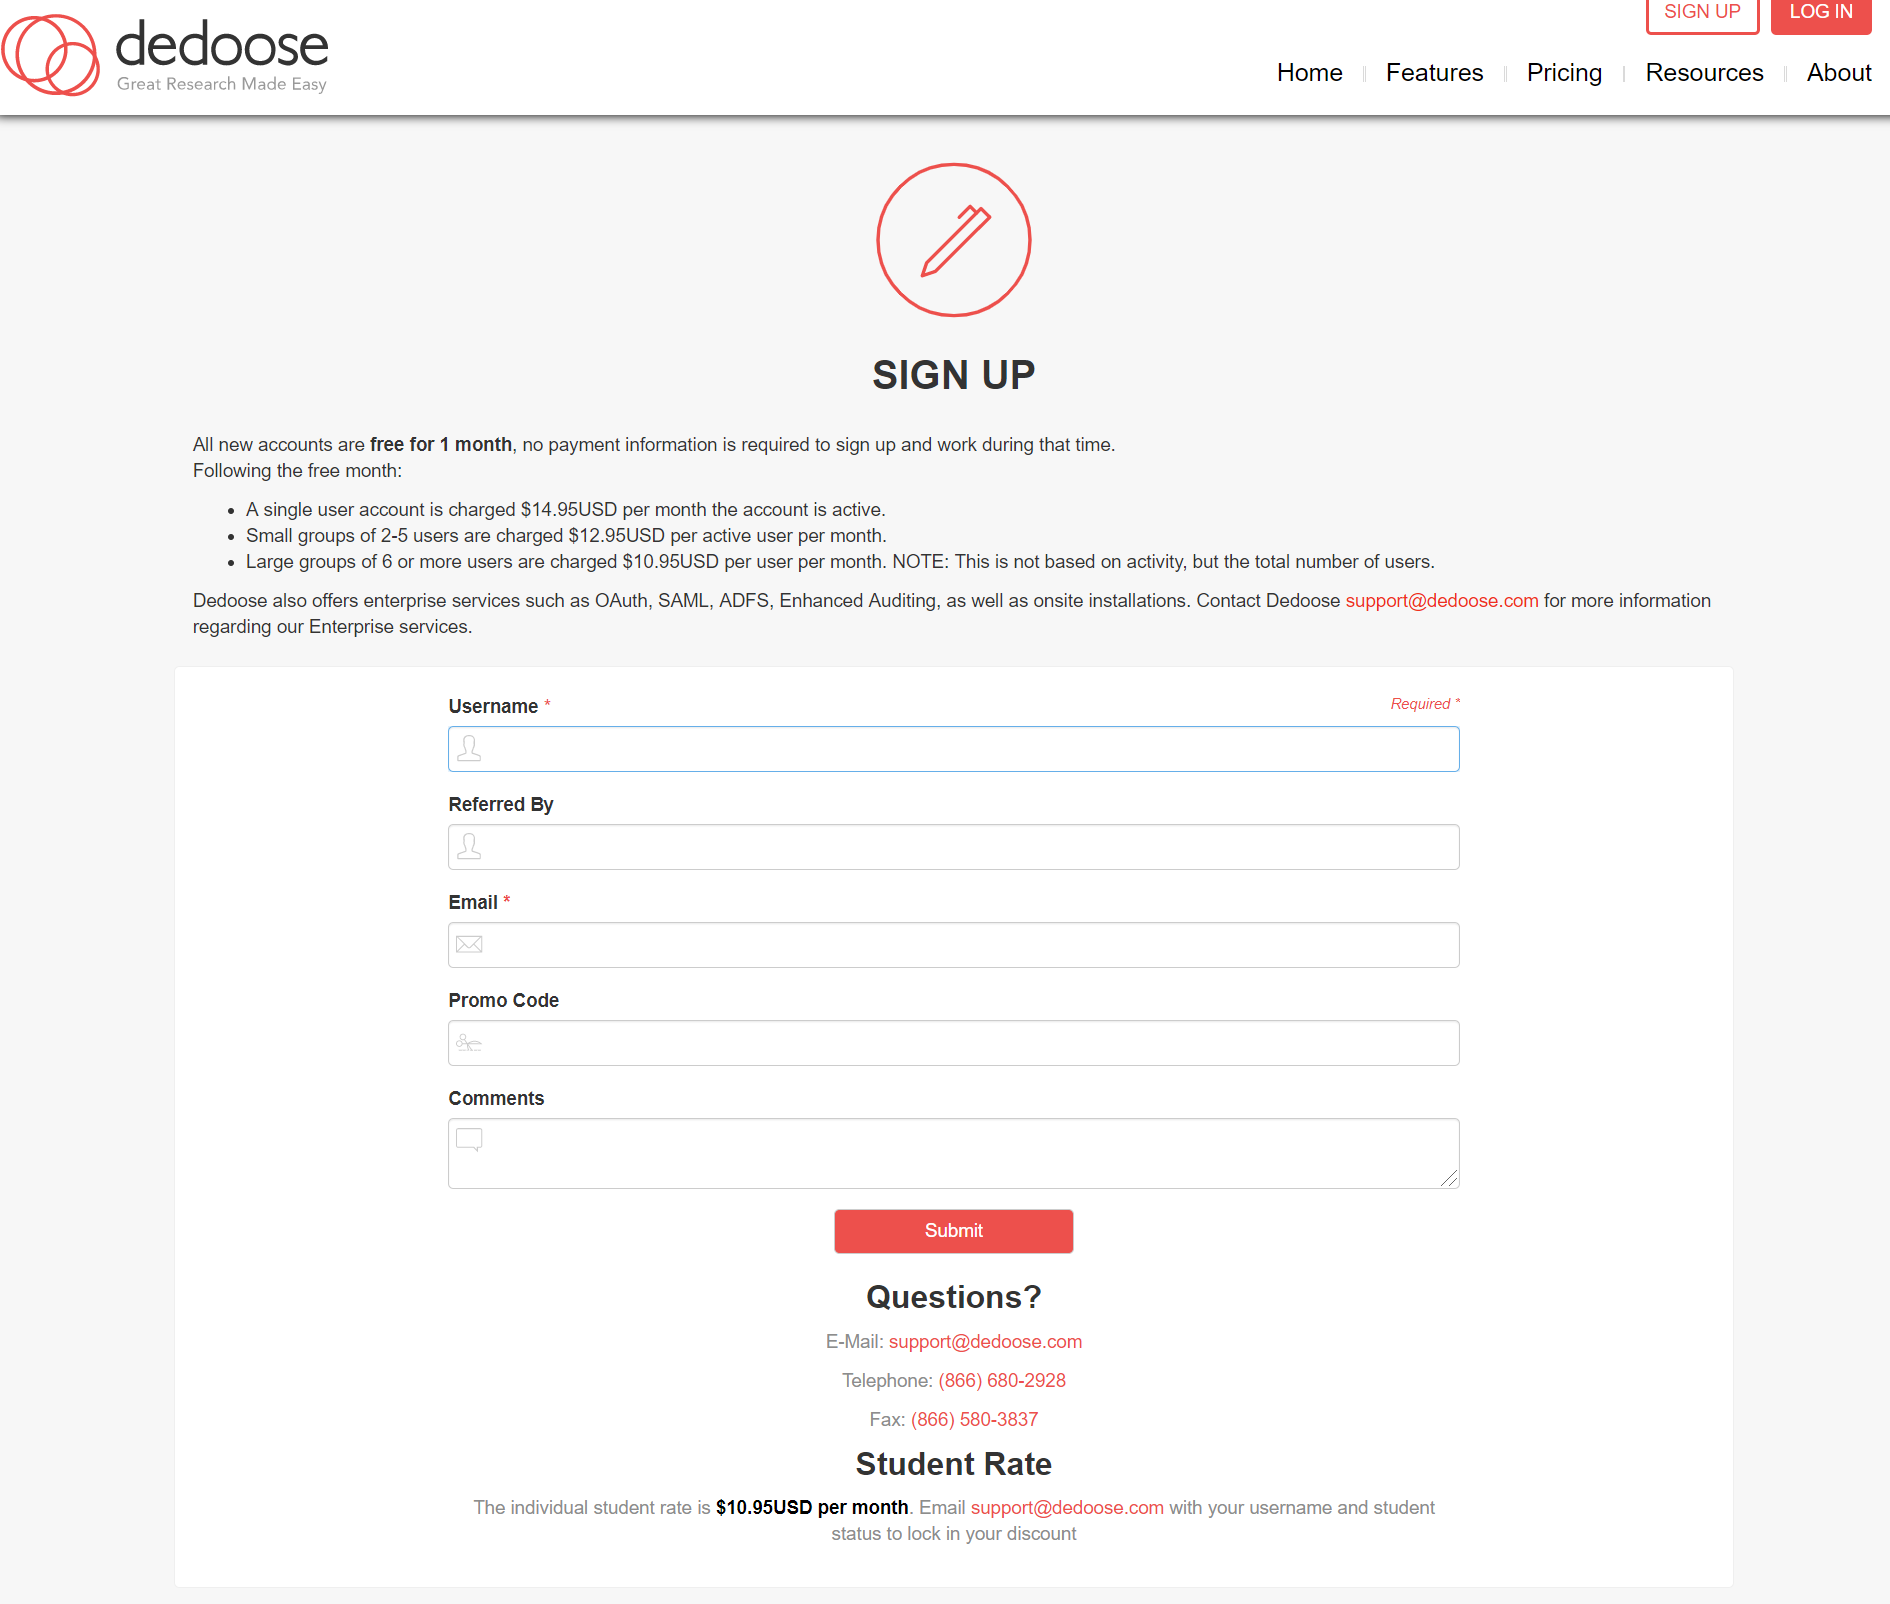
Figure 3: You can then easily create your own account.
Step 2: Login - you may need to enable Flash
Go to the login page once you have created your account.
At this stage you might need to enable Flash. There are instructions to do this on the dedoose site if you have this problem.
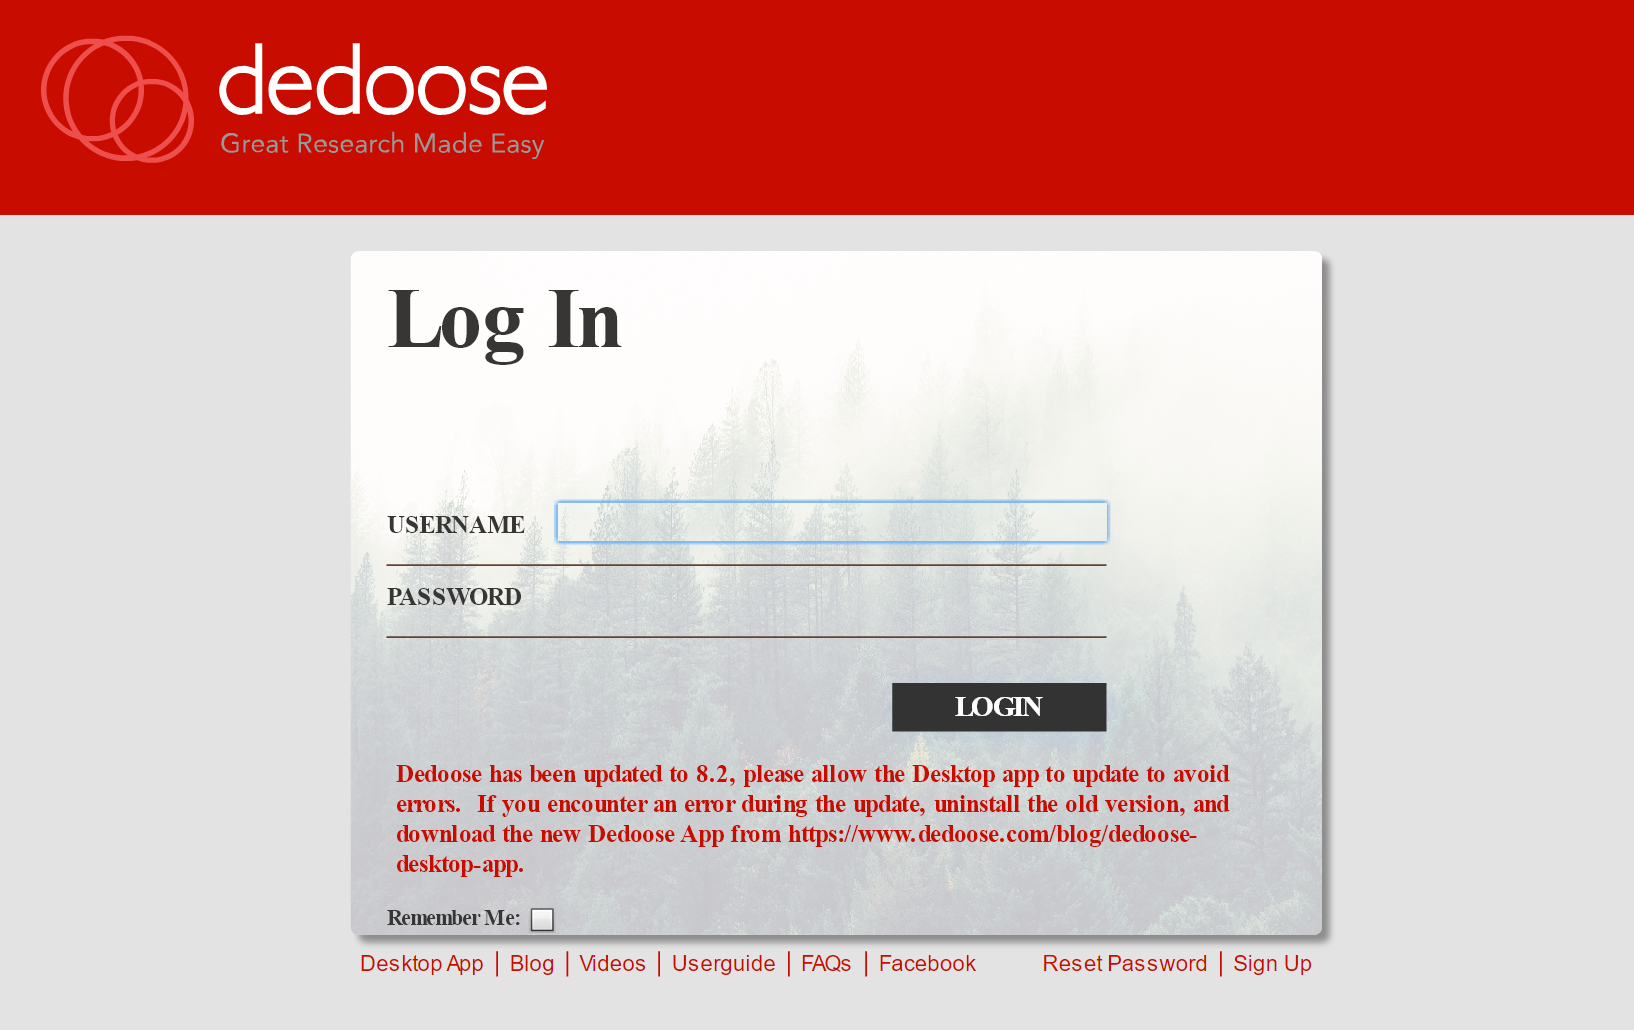
Figure 4: You can then easily create your own account.
Step 3: The Homepage
The Homepage of Dedoose gives you an overview of the project you are currently in. When you first sign up, you will start in your own “Demo Project” which Dedoose has created for you.
Figure 5: Start a new project by clicking on the (+) symbol.
Step 4: Create a Project
One of the first things you will want to do if you are using Dedoose for your own research is create a project.
You do this by clicking the “Projects” tab (with the hammer icon).
And then when in the Project section, click the plus sign (+) to start a new project.
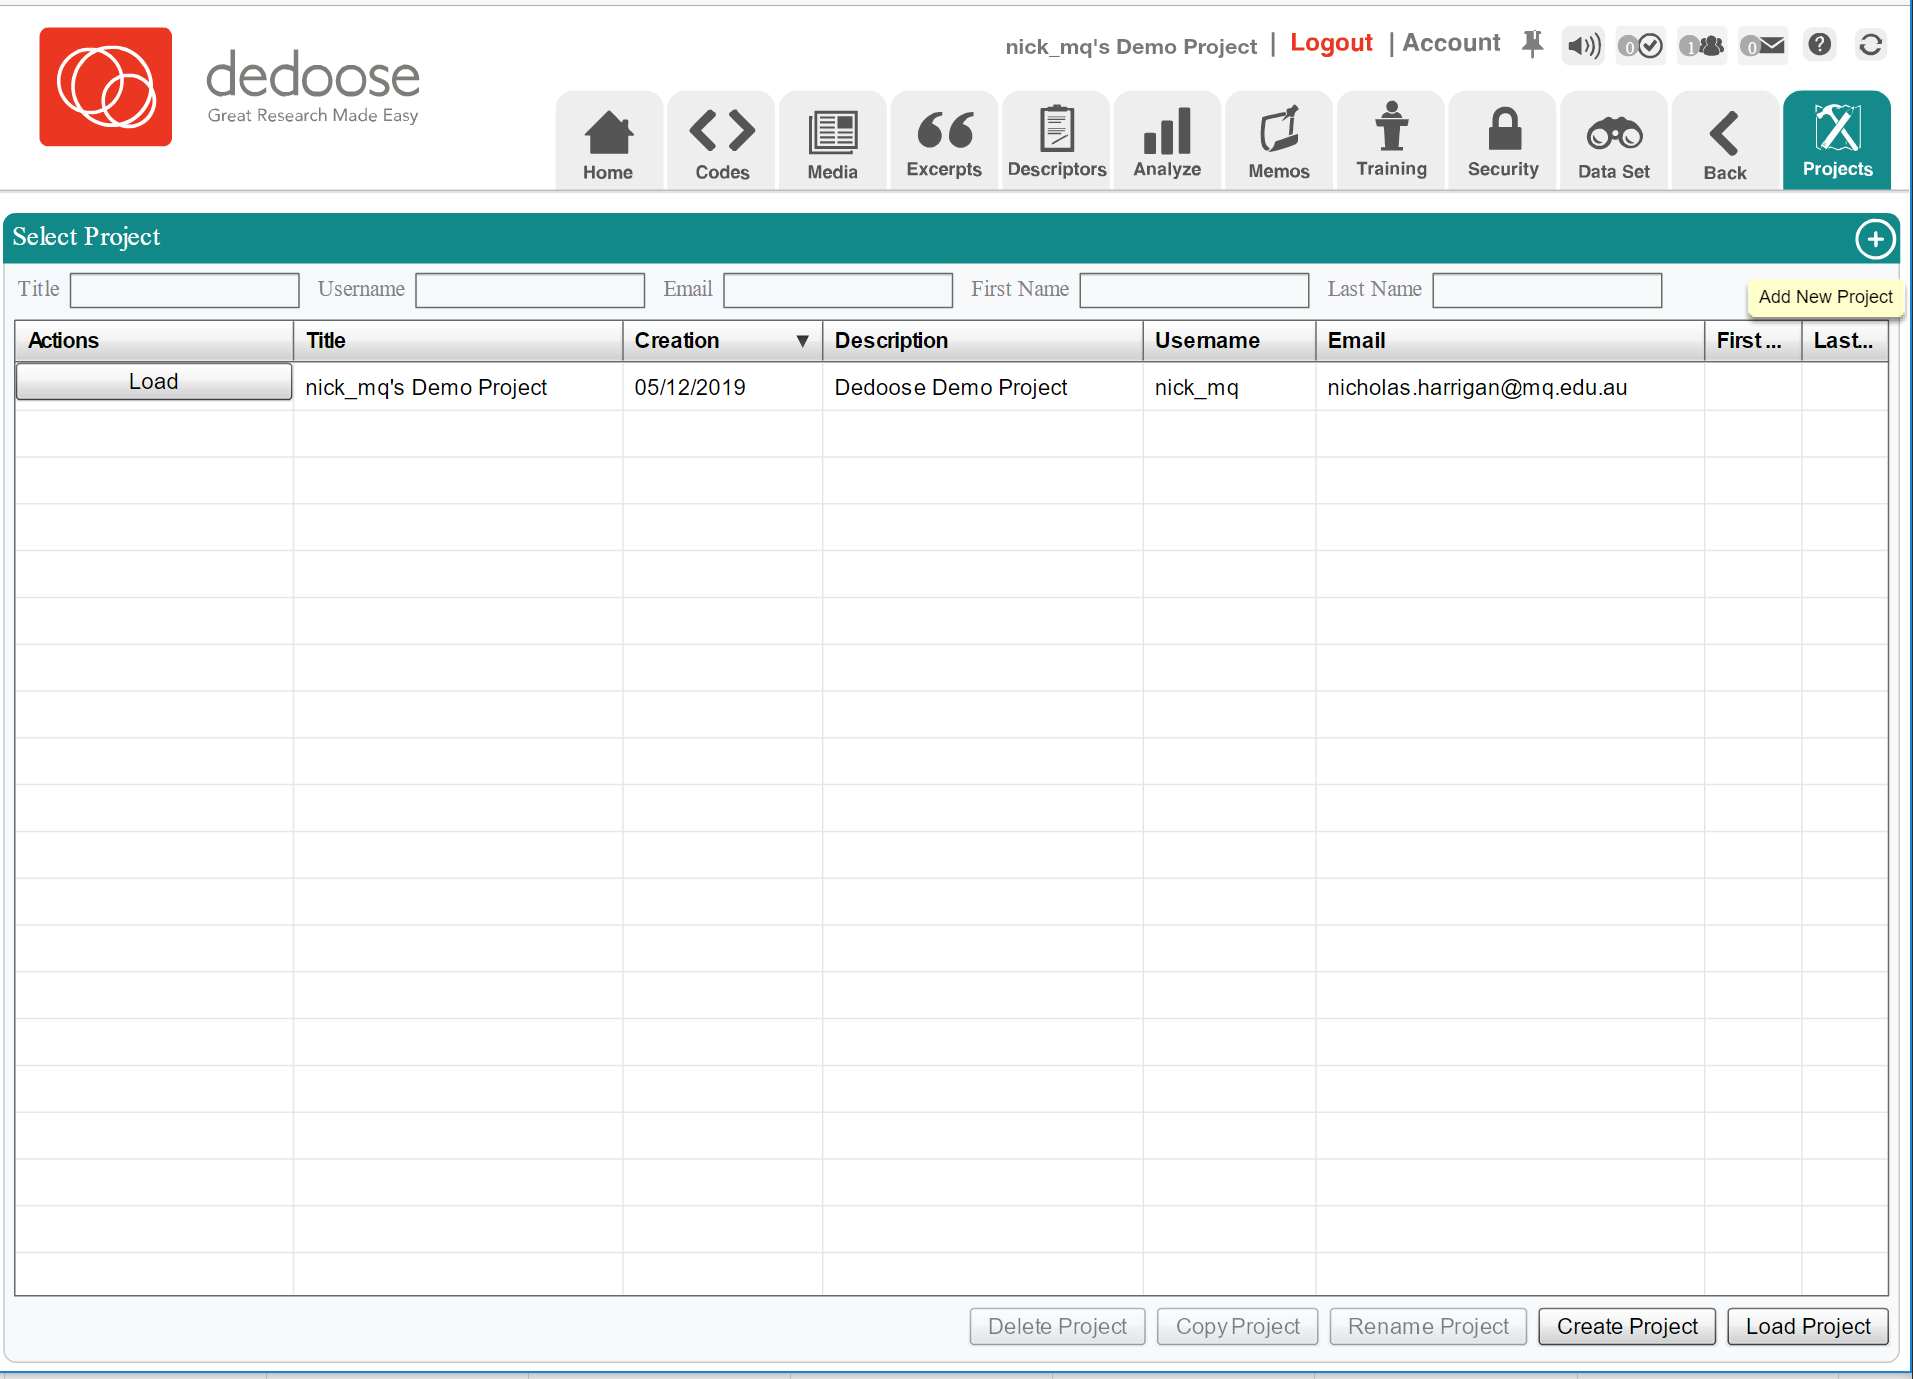
Figure 6: Start a new project by clicking on the (+) symbol.
Step 5: Import media
Once you have started a project, you will need to import your own media (such as interview transcripts, or newspaper articles).
You do this by clicking on the “Media” tab (with the newspaper text icon).
And then when in the “Media” section, click the plus sign (+) to import new media.
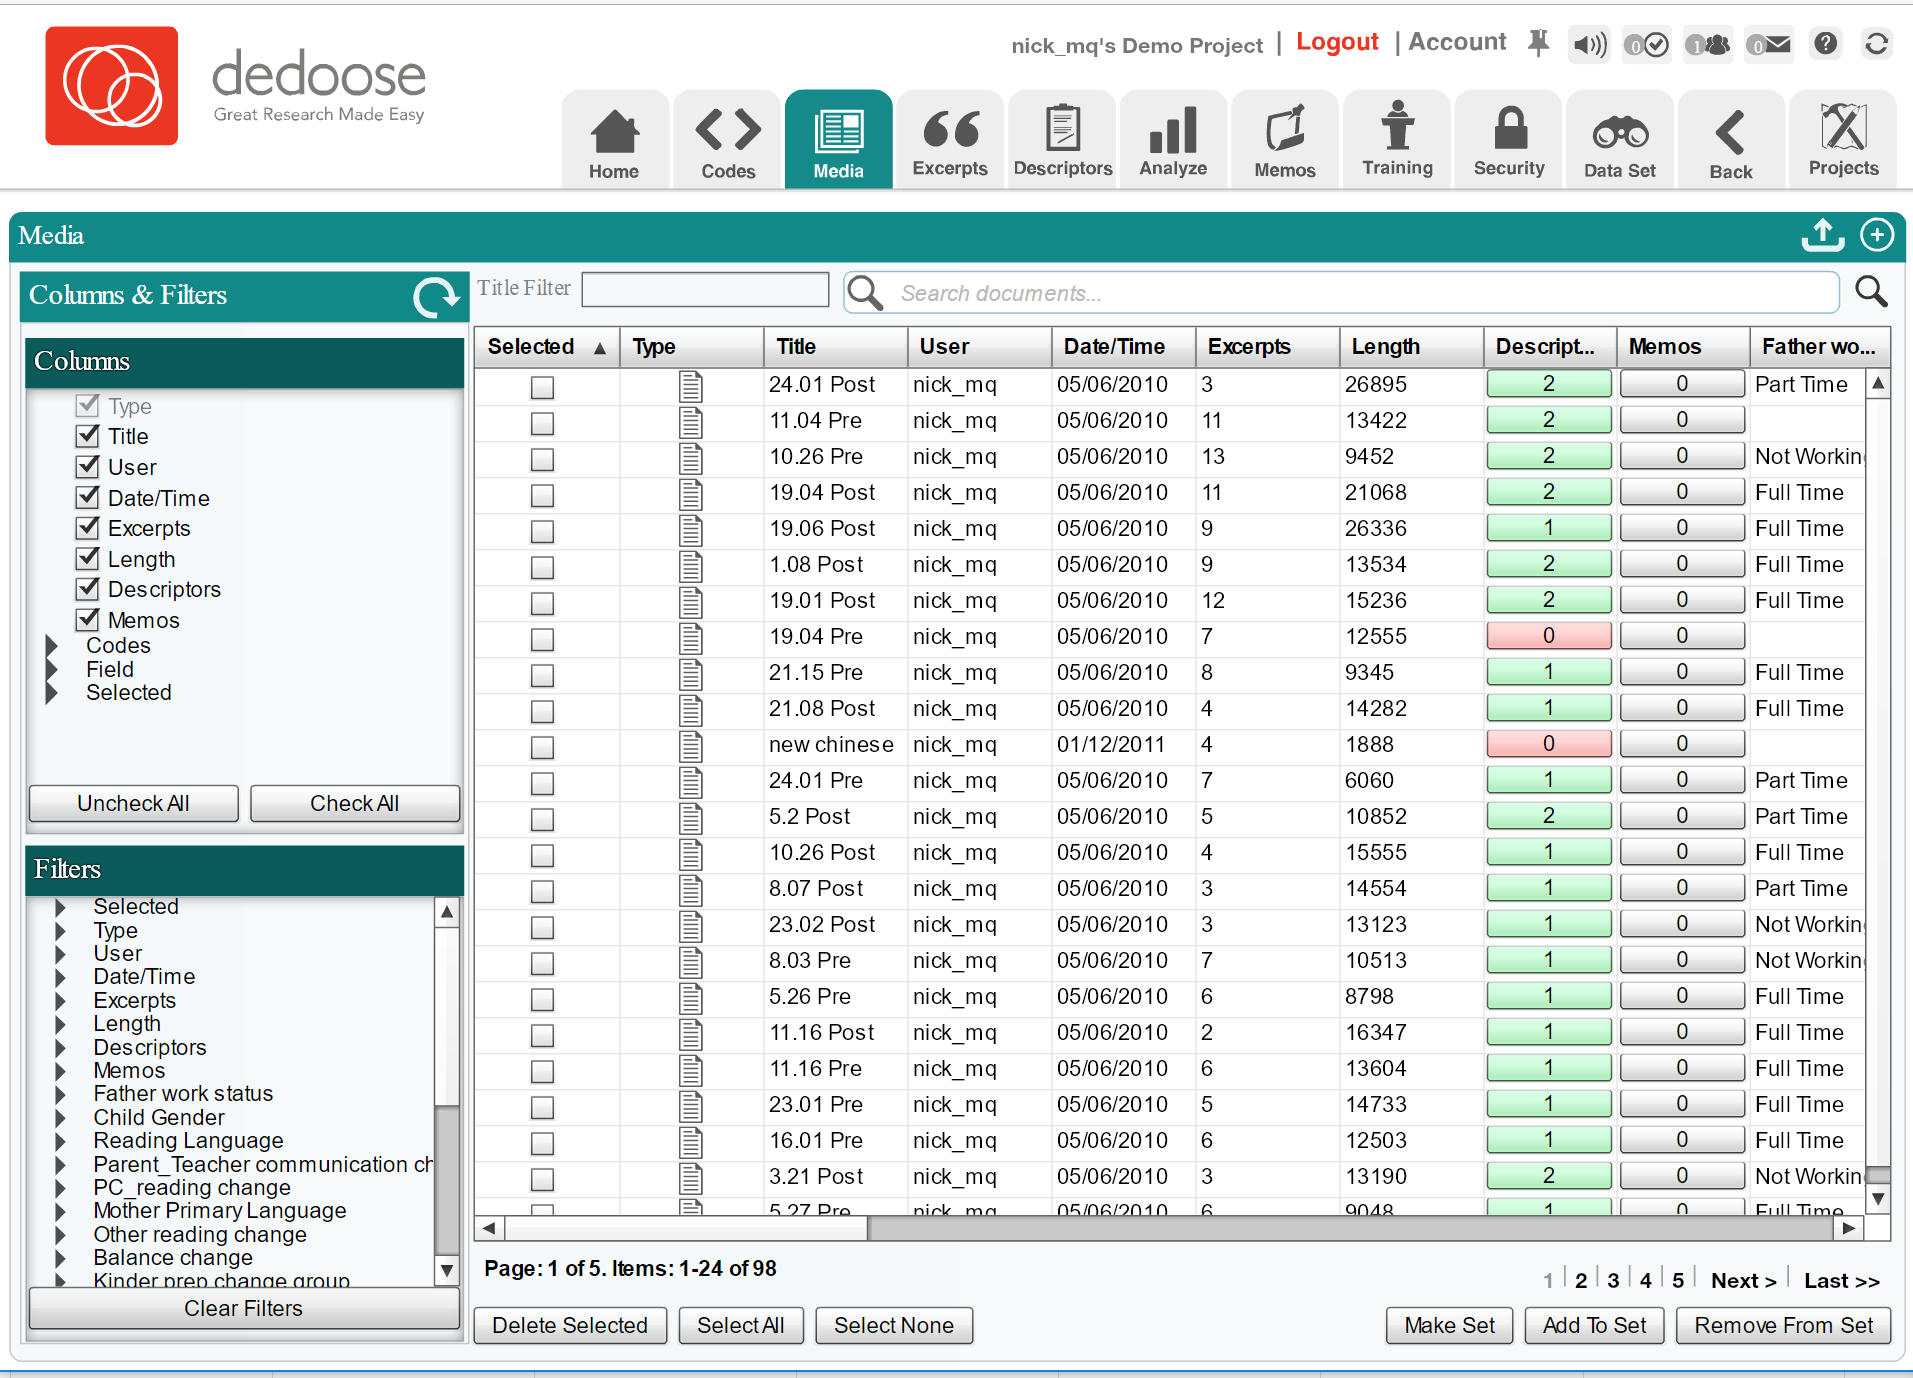
Figure 7: Import new media files by clicking on the (+)
Step 6: Create a code
If you know the codes you want to use, then you can go to the “Codes” tab (with the <> icon).
Dedoose distinguishes between levels of codes.
Codes are able to be nested, like bullet points in a list.
You can have root codes (parent codes), child codes, and ‘grandchild’ codes (and great-grandchild, and great-great-grandchild codes, etc.).
In the “Demo Project” created by Dedoose, you can see that there are:
- root codes (parent codes) such as “Reading by Mother”, “Reading by Others”, “Pre-Writing Activities”, and so forth
- child codes under “Reading by Mother”, called “Duration”, “Routine”, and “Frequency”.
- ‘grandchild’ codes under “Routine”, called “Bedtime Routine”, “Morning Routine”, and “Other Routine”.
To create a “root code” you click the plus sign (+) at the top right of the “Codes” window.
To create “child codes” you hover your mouse over the root code, and then click the (+) that appears on the root code.
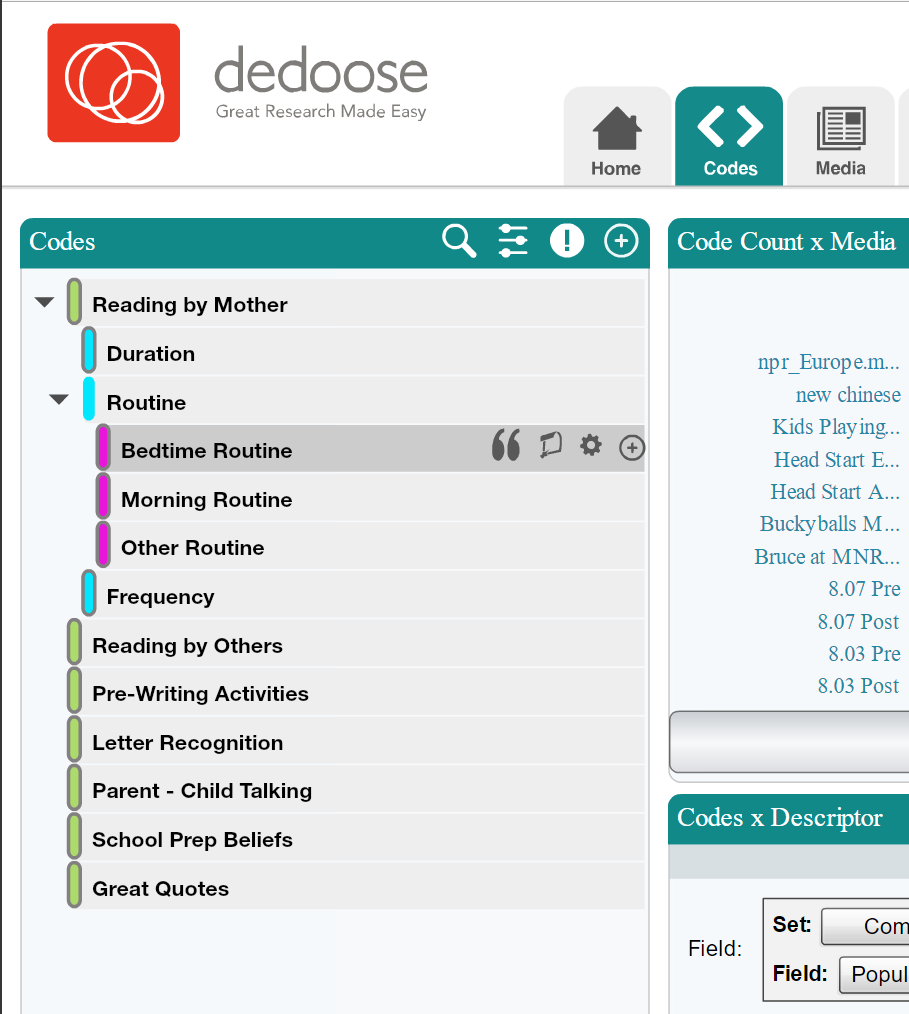
Figure 8: Create new root codes by clicking on the (+). You can also create child codes by clicking on the plus that appears when you hover your mouse over the root code.
Step 7: Highlight excerpts + code data
The main game when analysing qualitative data is reading and coding your data.
To do this, you need to click on an individual media file (either from the Media or the Home tabs).
A media document will open.
And from here you can read the media, and when you find text you want to highlight and code, you simply select the ‘excerpt’, right click on the highlighted text, and then select ‘Add Code(s)’.
When you click ‘Add Code(s)’, the selected text will change colour, and a ‘Quick Code’ selector will open. You can then simply double click on the codes you want to add to that section.
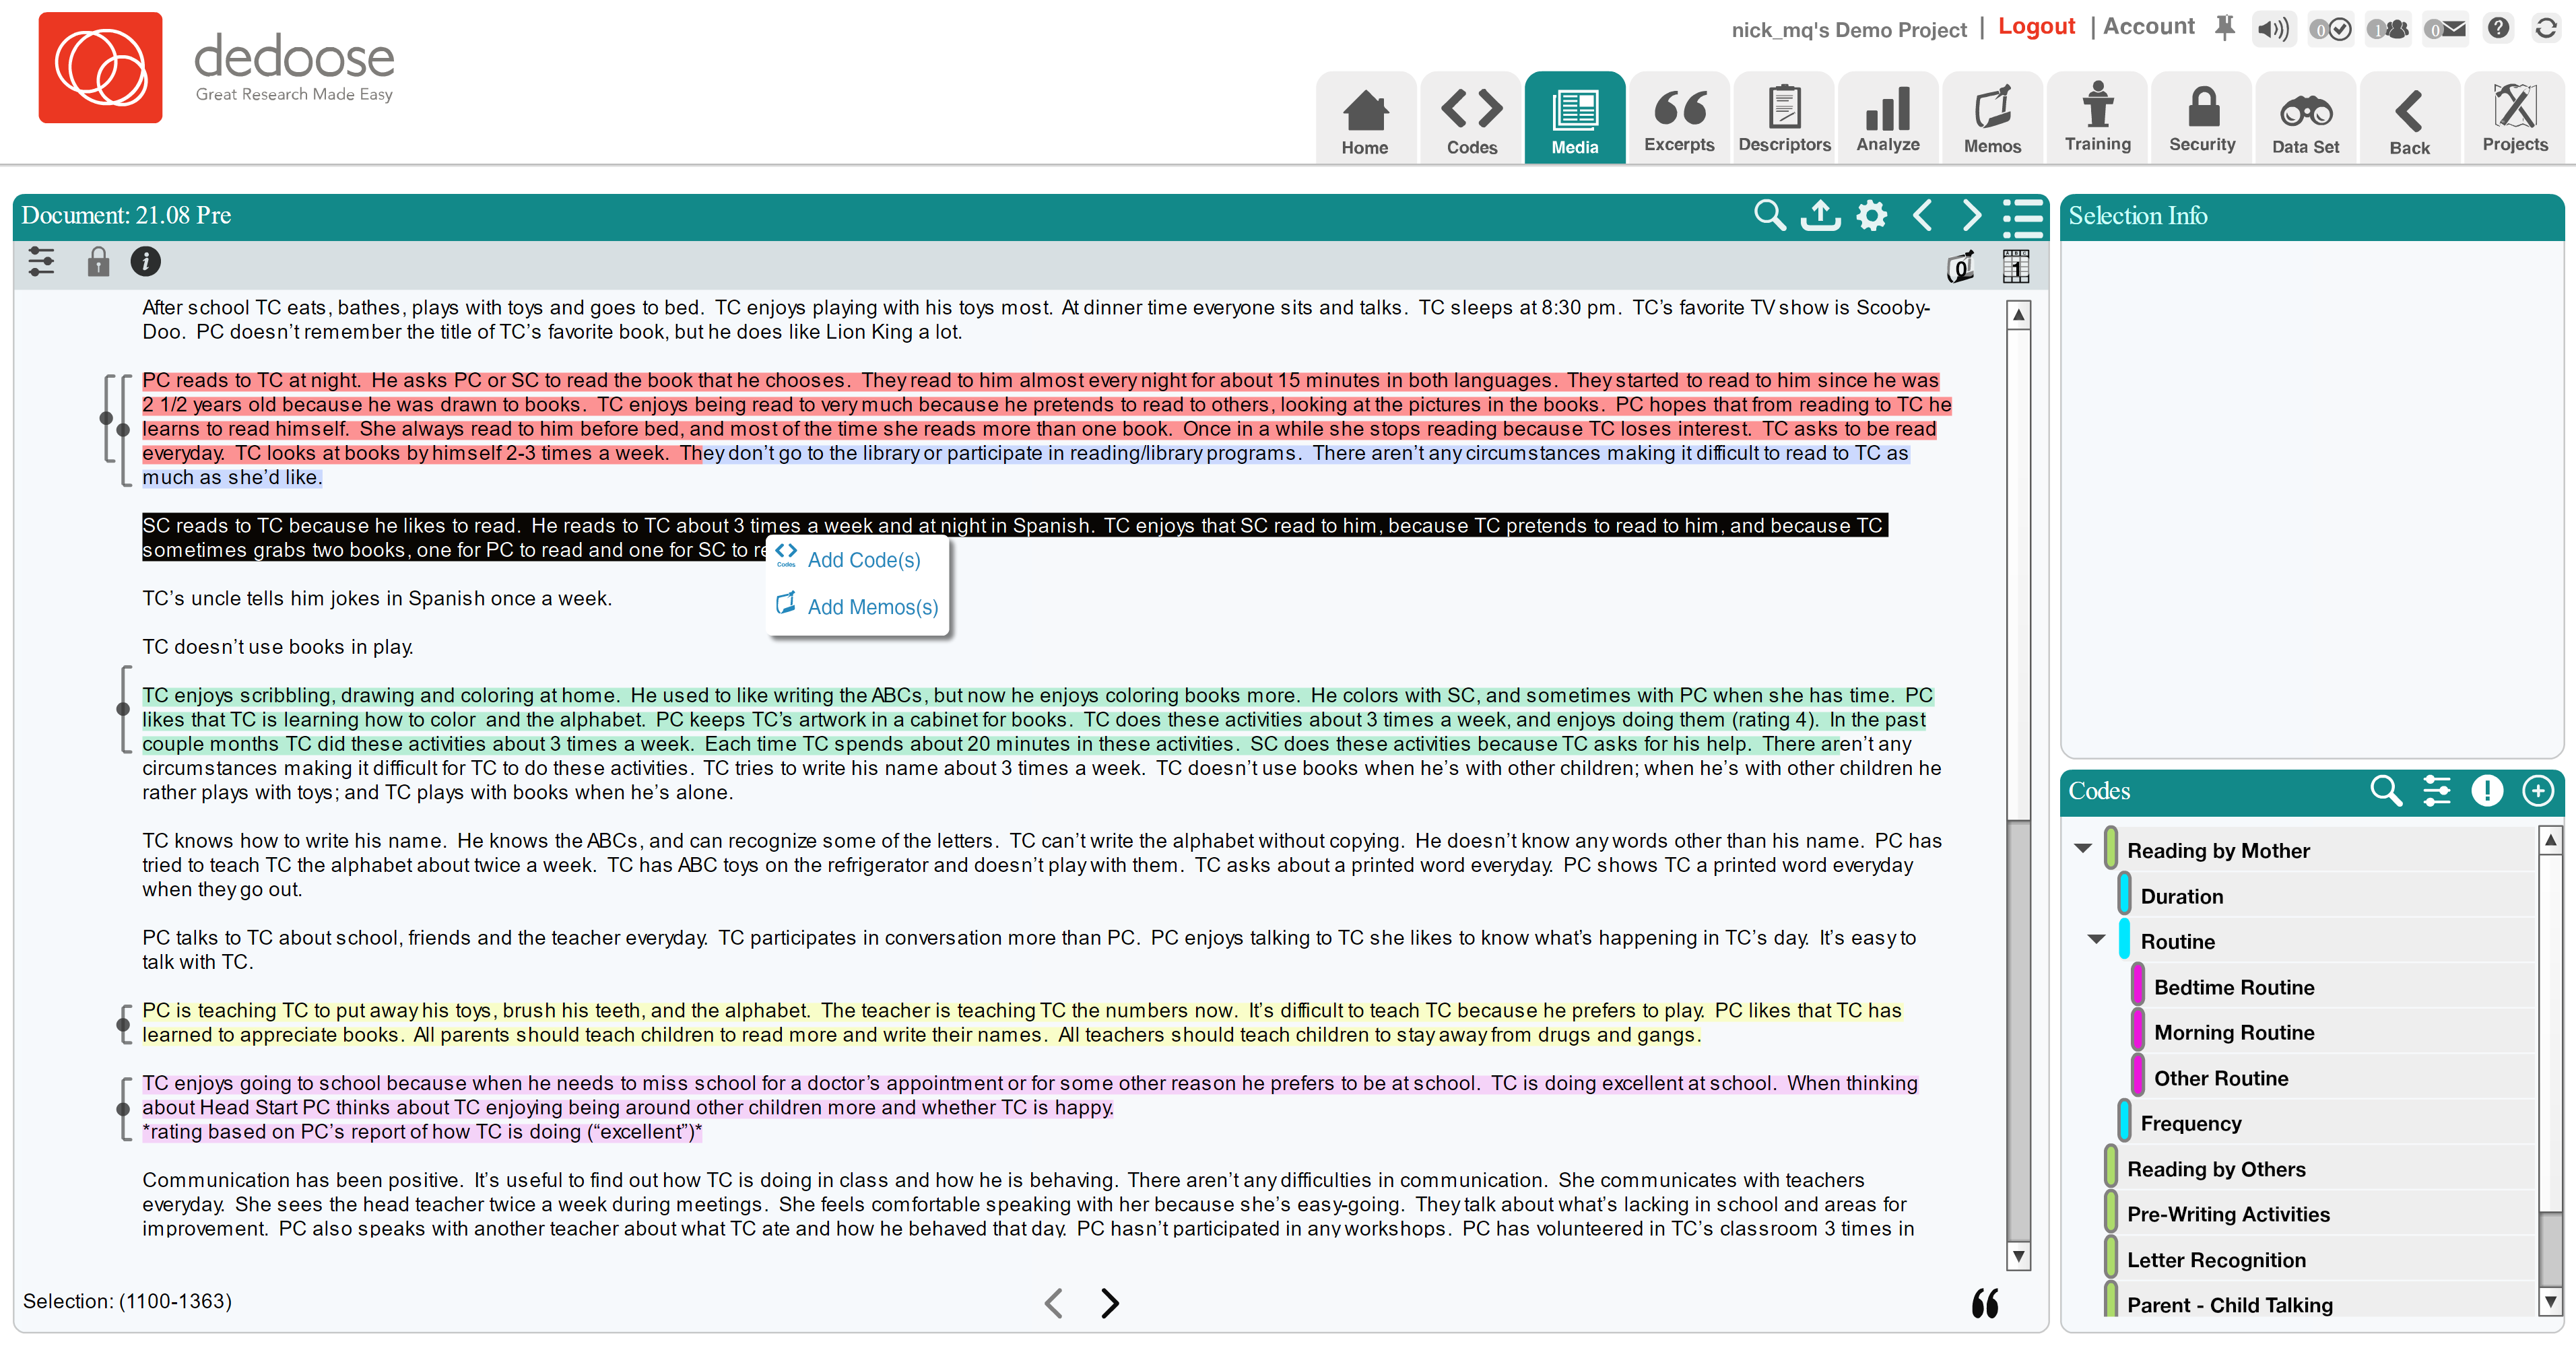
Figure 9: To code an excerpt, simply select the text you want to code, right click, and select ‘Add Code(s)’.
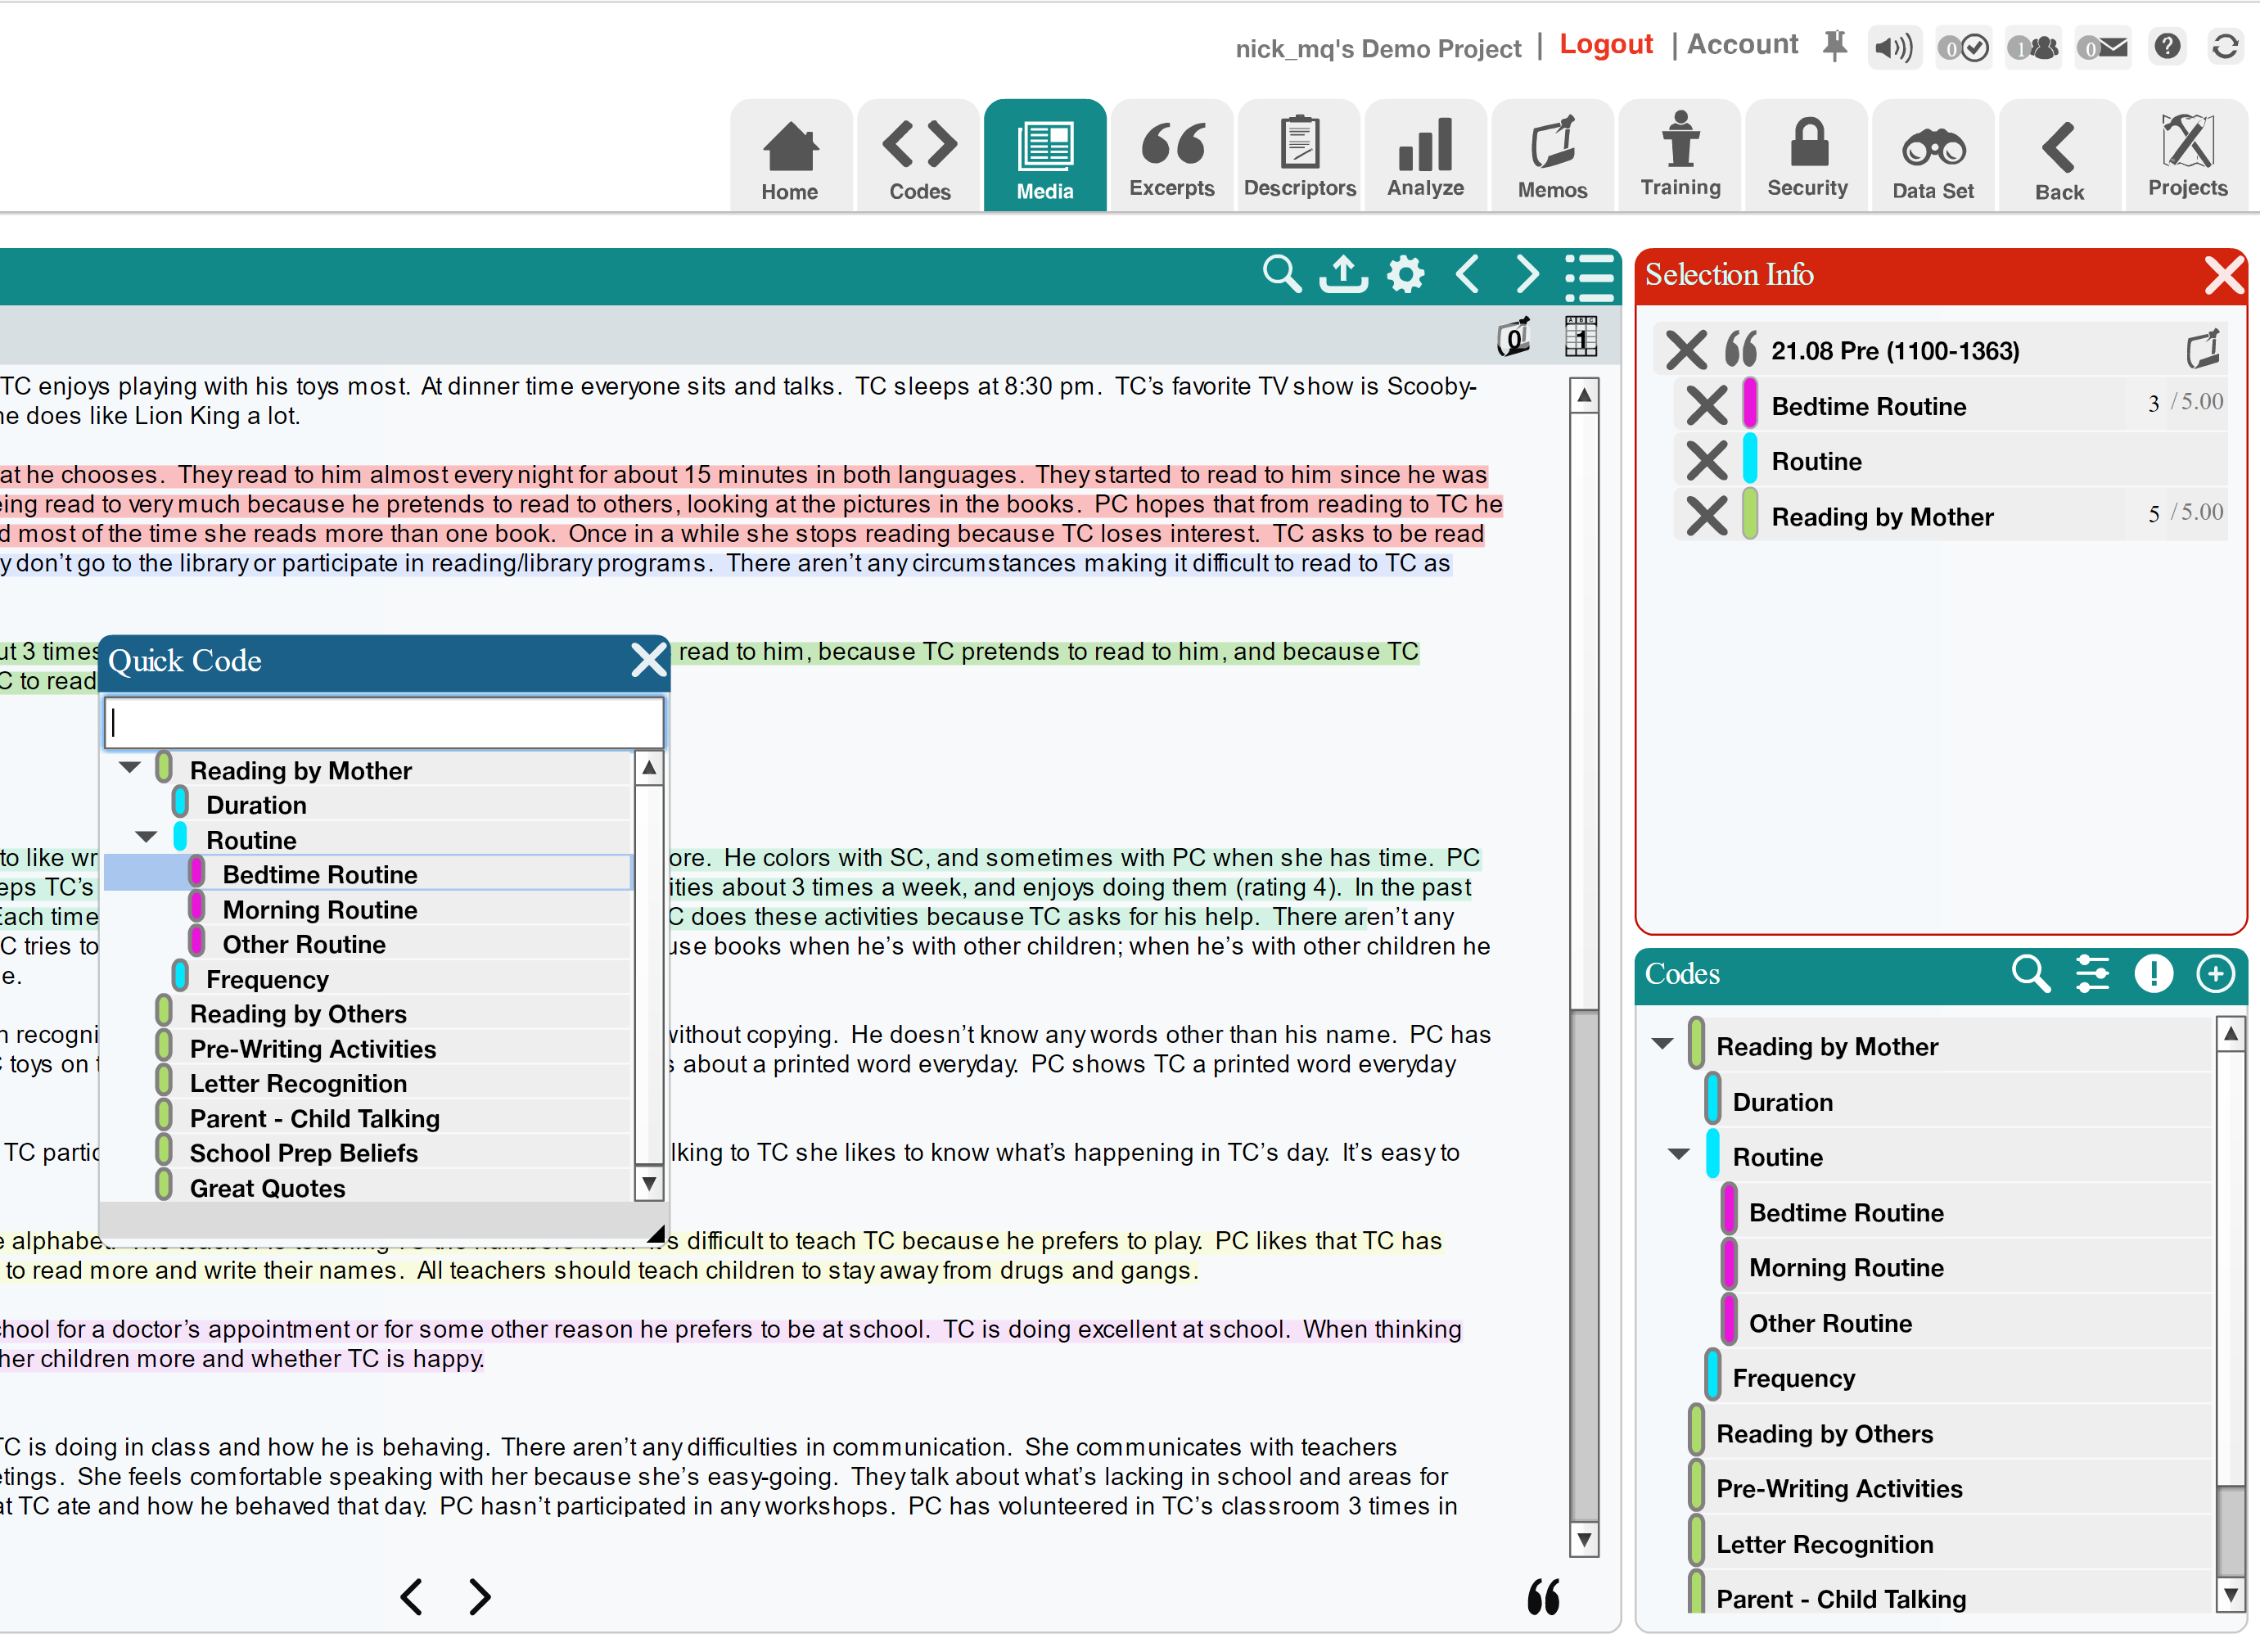
Figure 10: Double click the codes you want in the ‘Quick Code’ selector.
Upcoding
One issue you might have at this stage is that there is a setting called “Upcode”, which if it is off, then selecting a childcode will NOT also select the parent/root code.
I recommend turning on ‘upcoding’, which you can do by selecting the ‘Settings Panel’(with the three lines with dots, like volume switches icon) in the Codes window in the bottom right corner, and then selection “Automatic Upcoding” “On”.
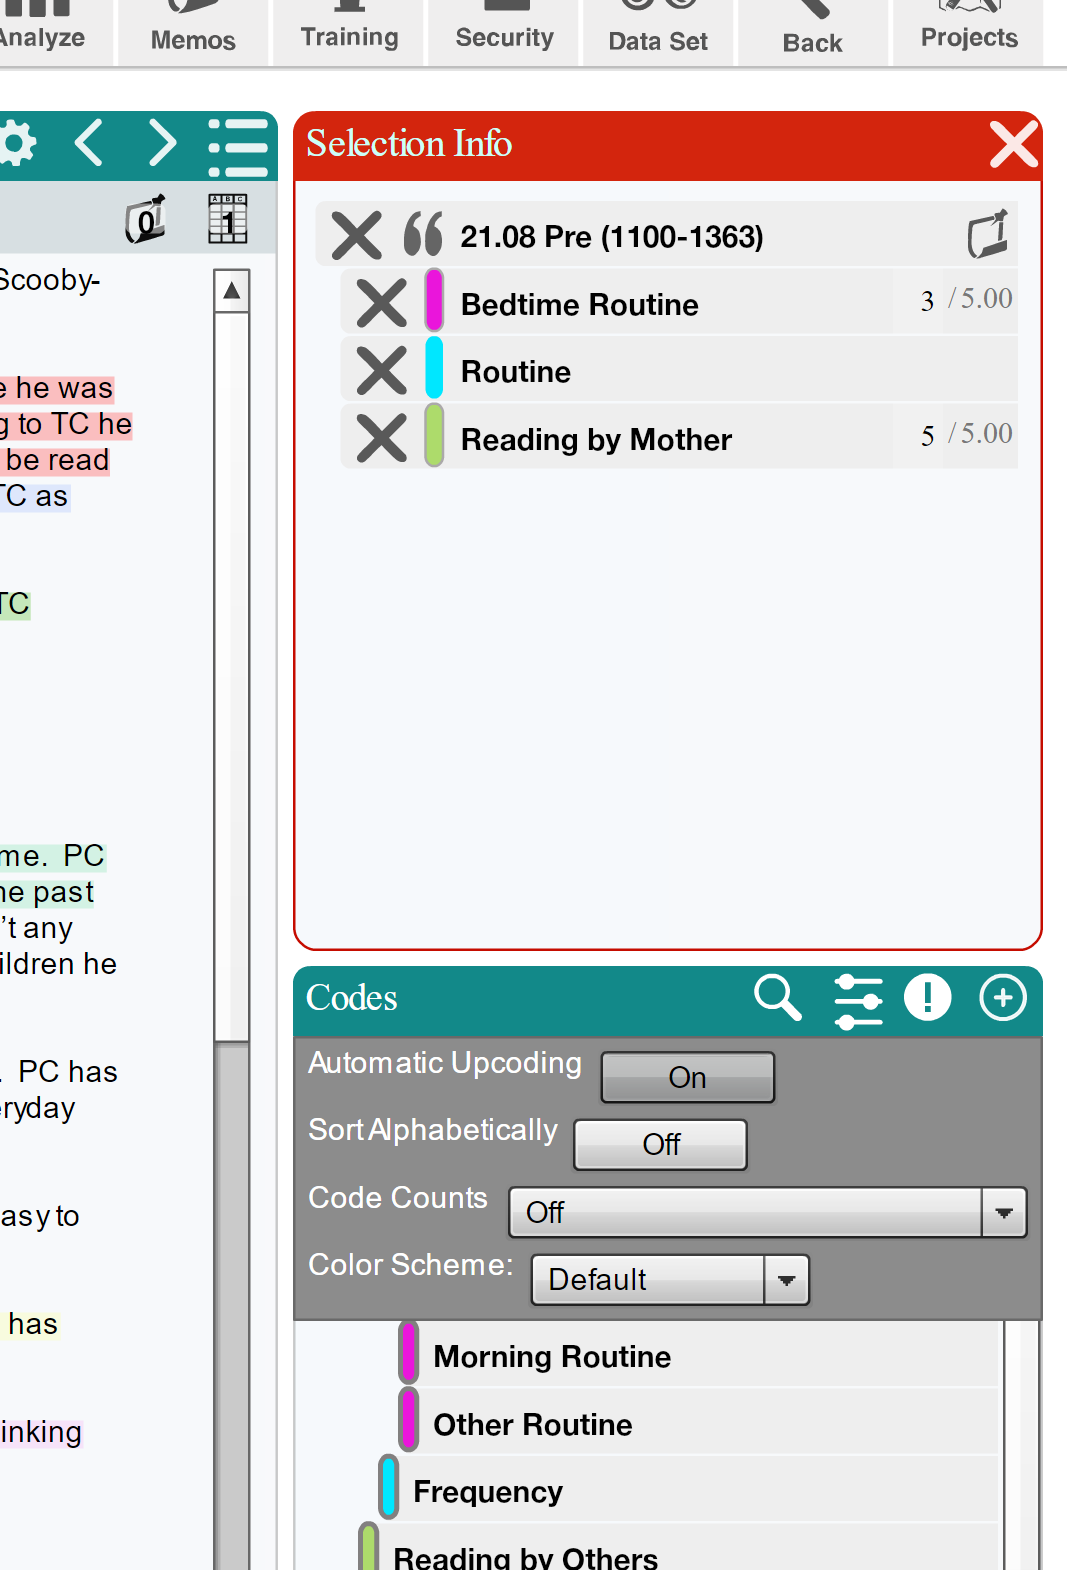
Figure 11: Turning Automatic Upcoding On is normally the best setting.
Step 8: Write a memo
One of the parts of qualitative analysis is writing down your thoughts and ideas as you are reading and coding.
We do this with memos.
In Dedoose you can create memos by simply clicking the “Memos” tab.
Unlike other tabs, Memos open over the top of whatever you have open.
This is because Memos are supposed to be something you can use at any stage of the process - it isn’t separate from coding, but done simulaniously.
The memo window opens, and you can click on “+ Create New” to create a new memo.
Once you have created the new memo, an important feature appears: you can link the memo to media, excerpts, or codes, so as to make sure your memo is easy to relate to the part of your research you are making the memo about.
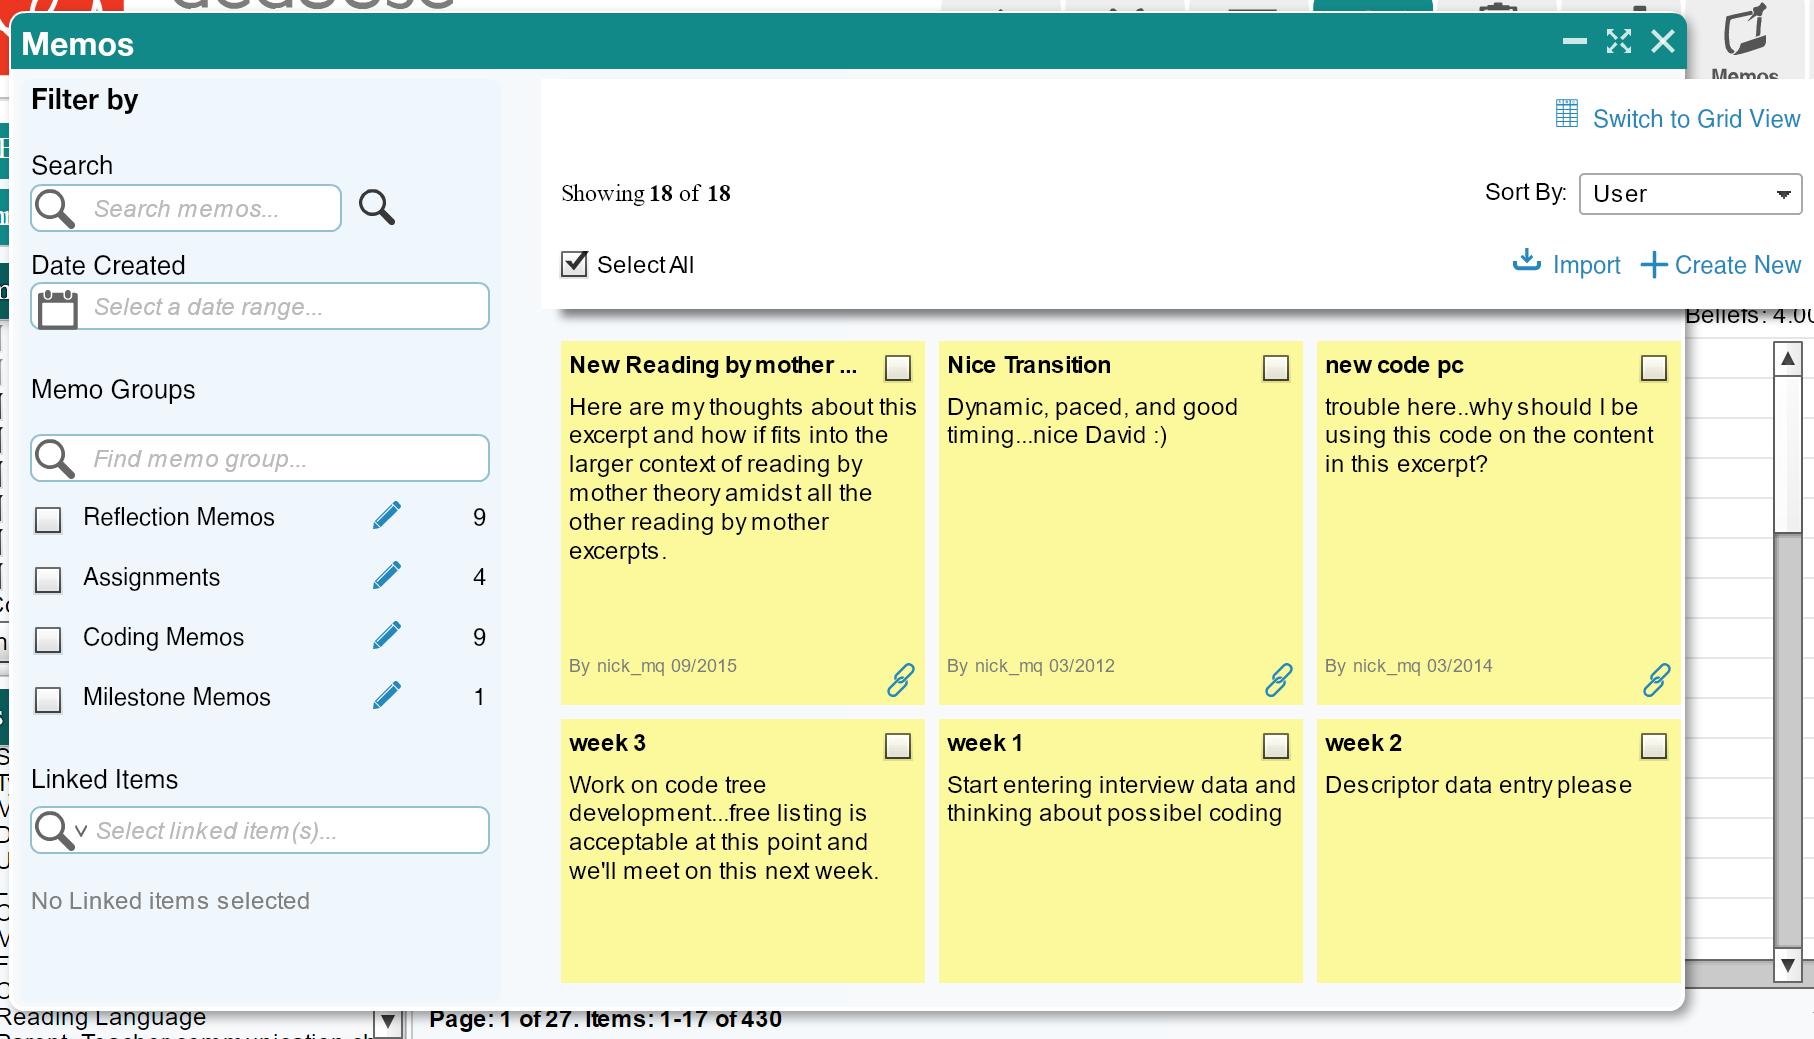
Figure 12: The Memo window opens over the top of the other Dedoose windows. You can click ‘+Create New’ to create a new memo.
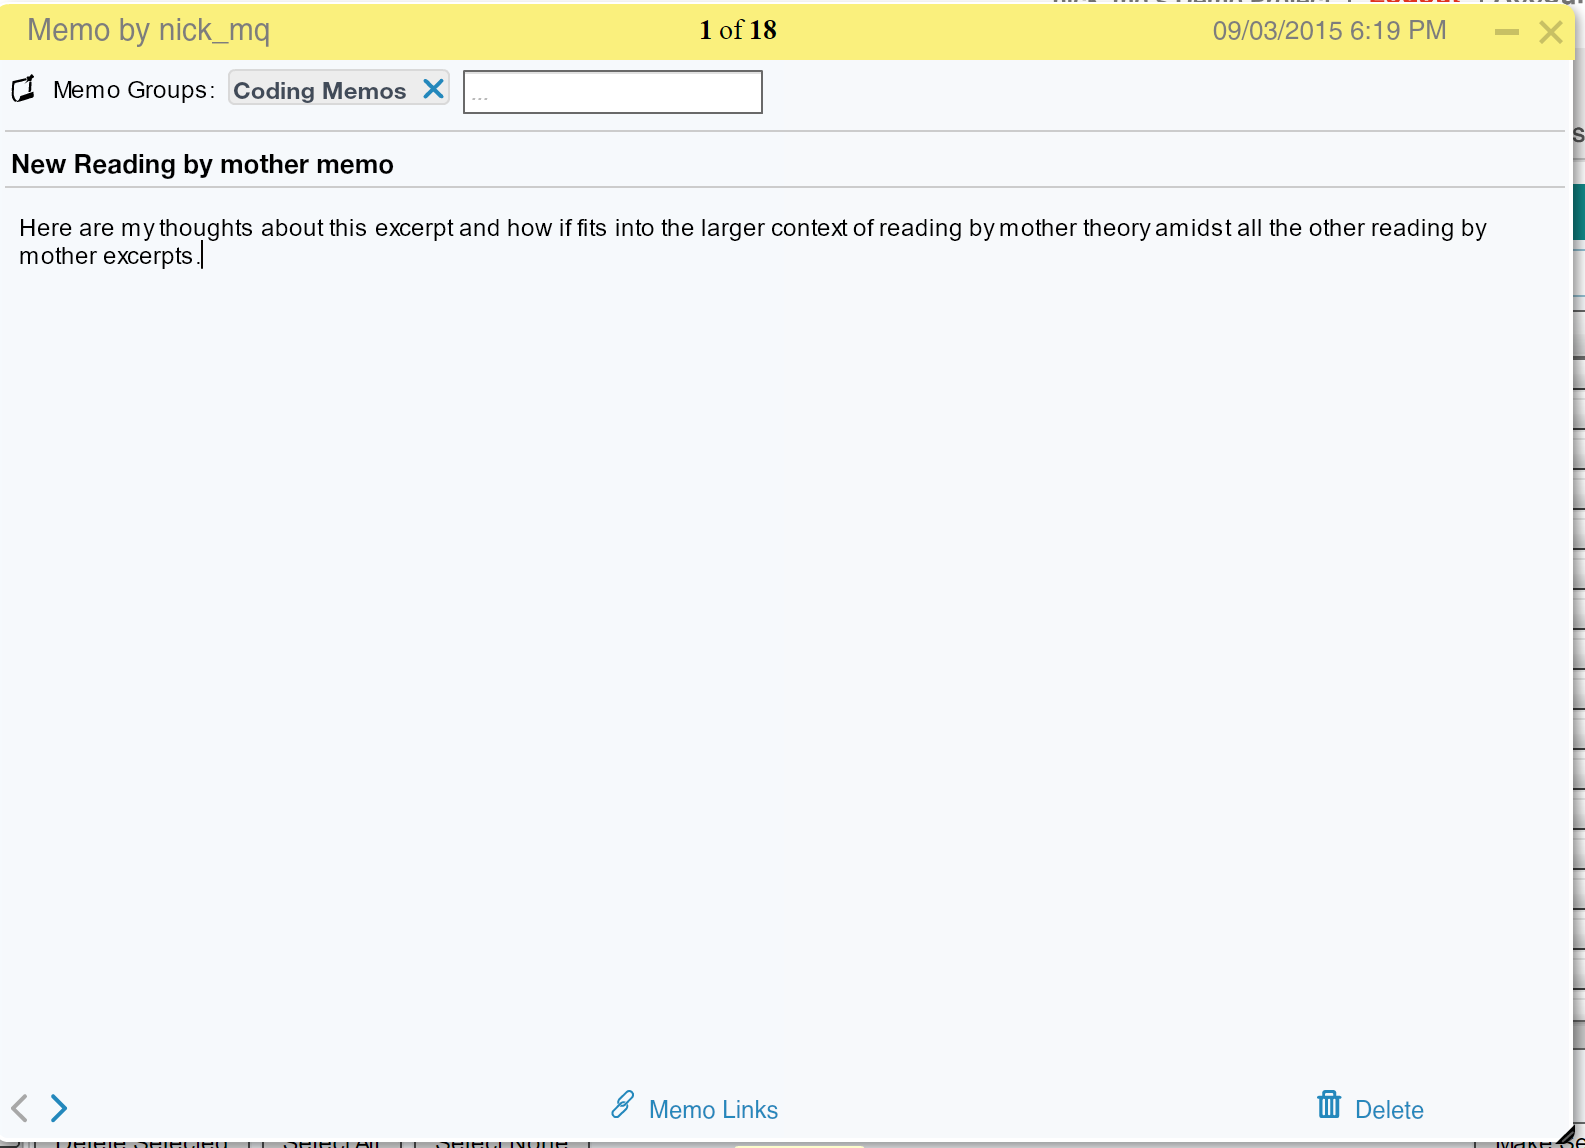
Figure 13: When you have created a memo, you can click ‘Memo Links’ to link your memo to excerpts, codes, or media
Step 9: Export excerpts
The last thing you will probably want to do once you have coded your data is export the excerpts.
You do this by clicking on the “Excerpts” tab, and then clicking the export button on the top right of the Excerpts window.
You can choose what to download and how much information about the media, codes, coders, etc.
You can download as an excel spreadsheet or a Word document. Below is an example of a Word document with exported data from the default “Demo Project”.
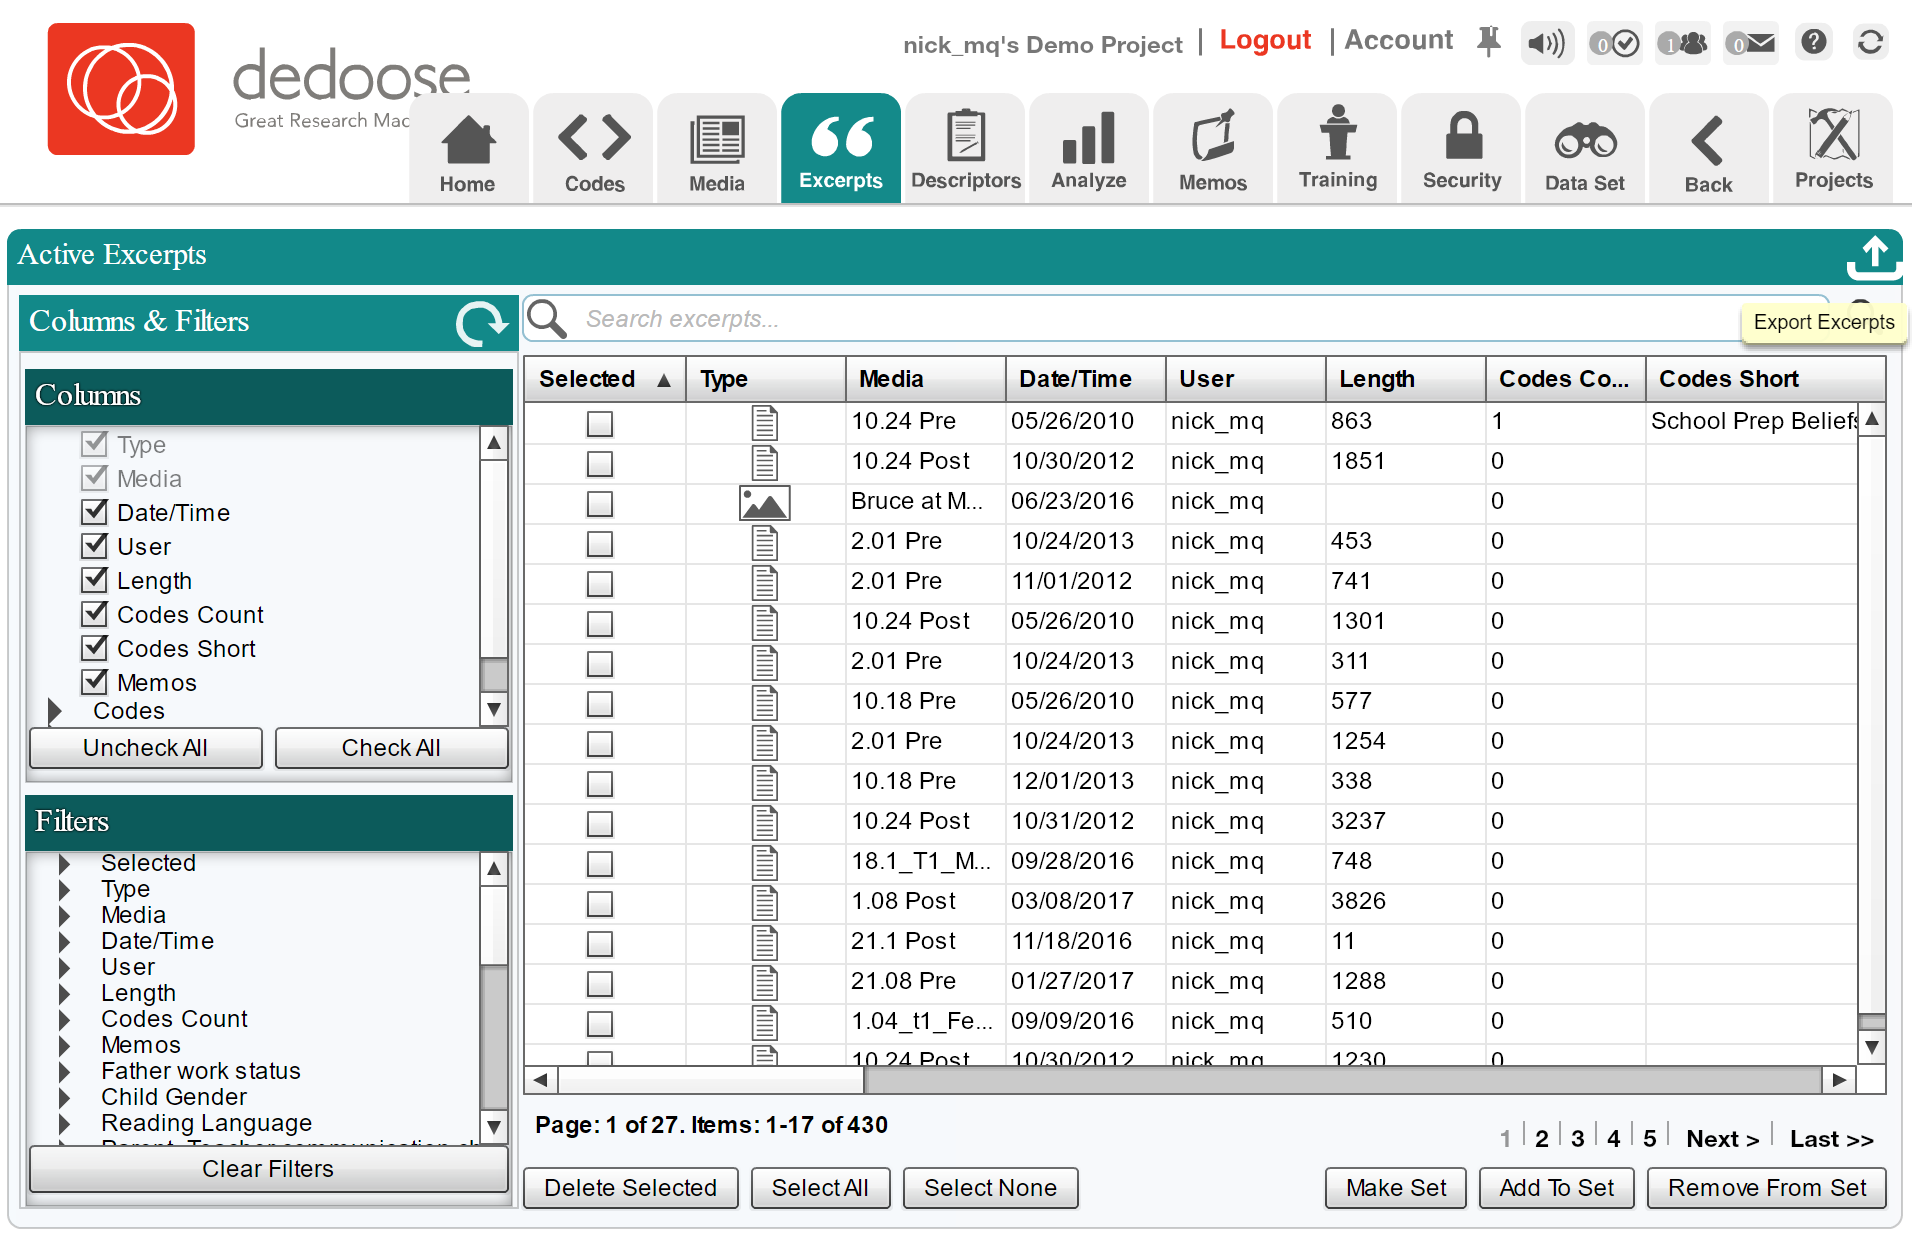
Figure 14: You can export your excerpts from this tab.
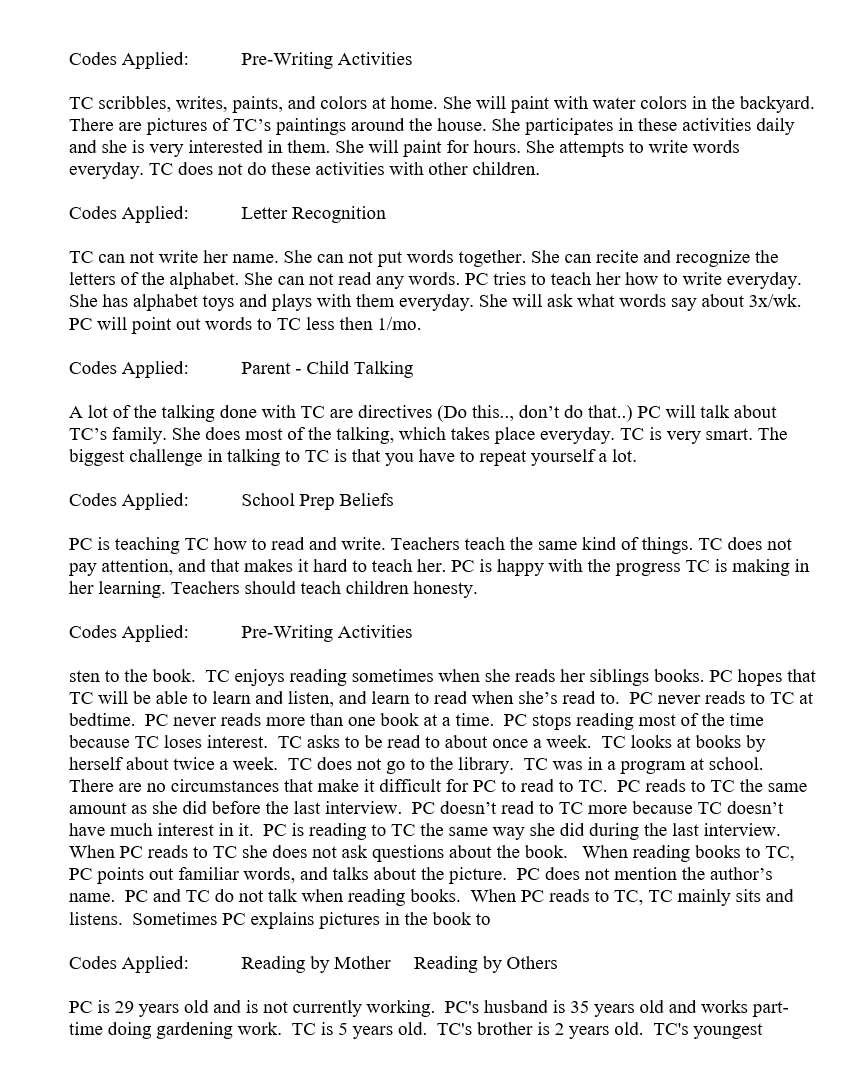
Figure 15: An example of exported excerpts as a Word document.